Bandsaw Restoration: Painting the Saw
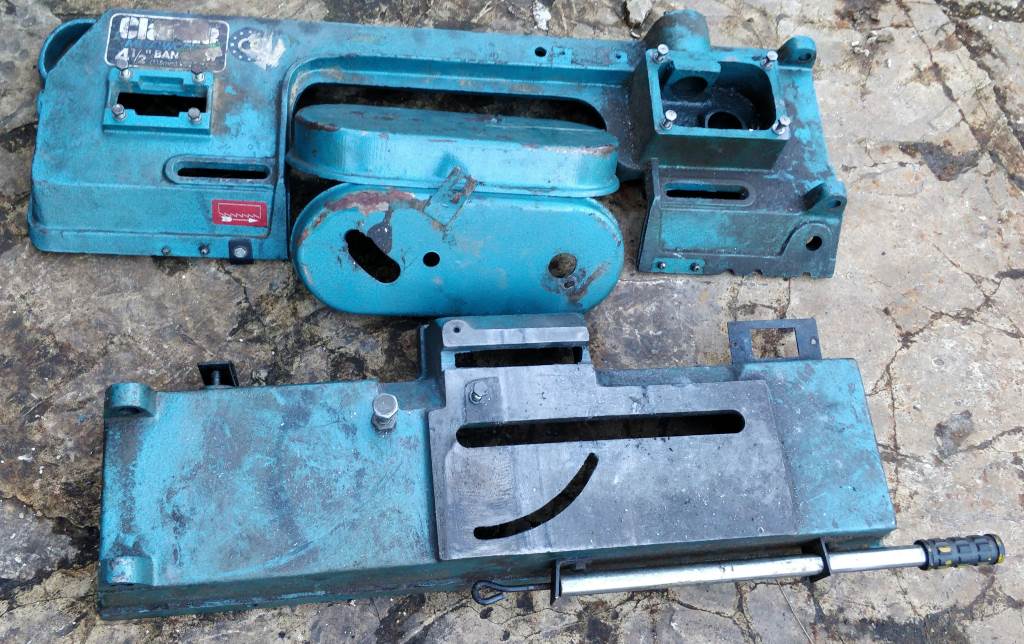 |
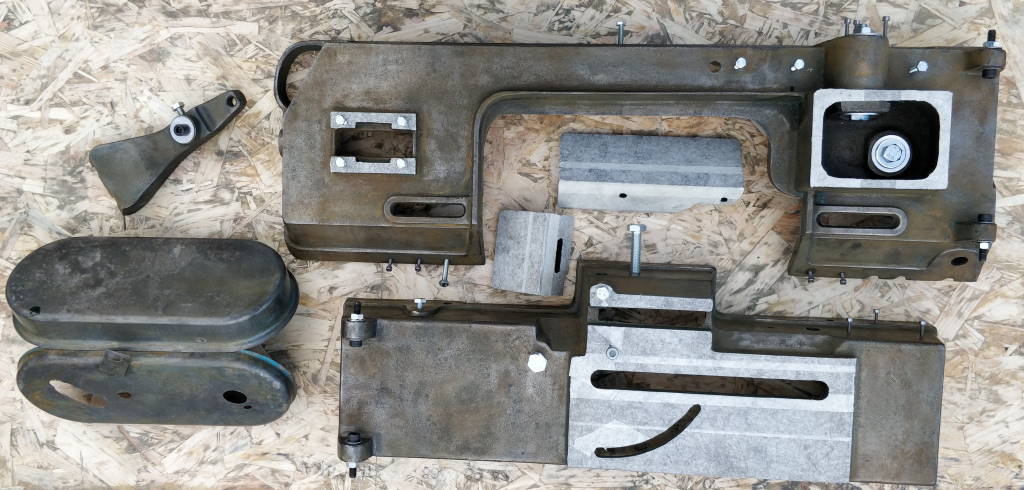
As you can see from this photo (click for a bigger view), the painted bandsaw parts have seen better days! As the bandsaw was in pieces, it seemed a good idea to give the parts a tidy-up and a new coat of paint.
Paint Stripping
Following advice online, I bought some "Starchem Synstryp" paint stripper on ebay (along with some expensive new ABEK1P3 filters for my face mask and some new chemical resistant gloves: the paint stripper is nasty stuff).
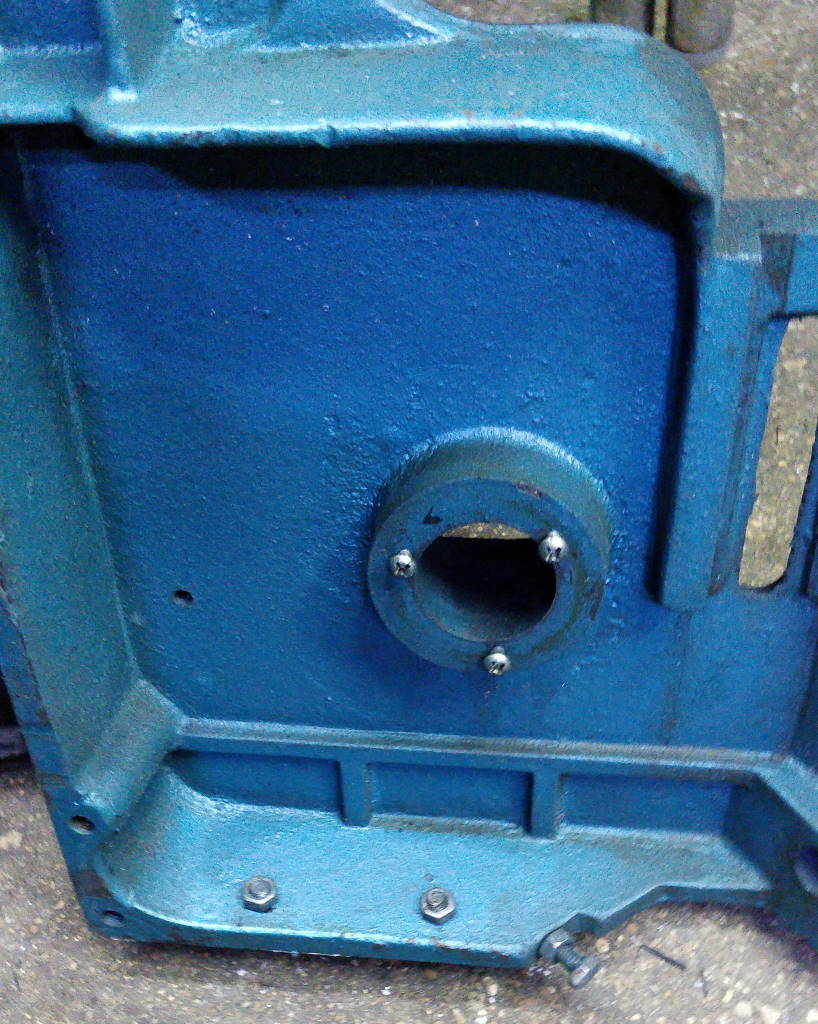 | 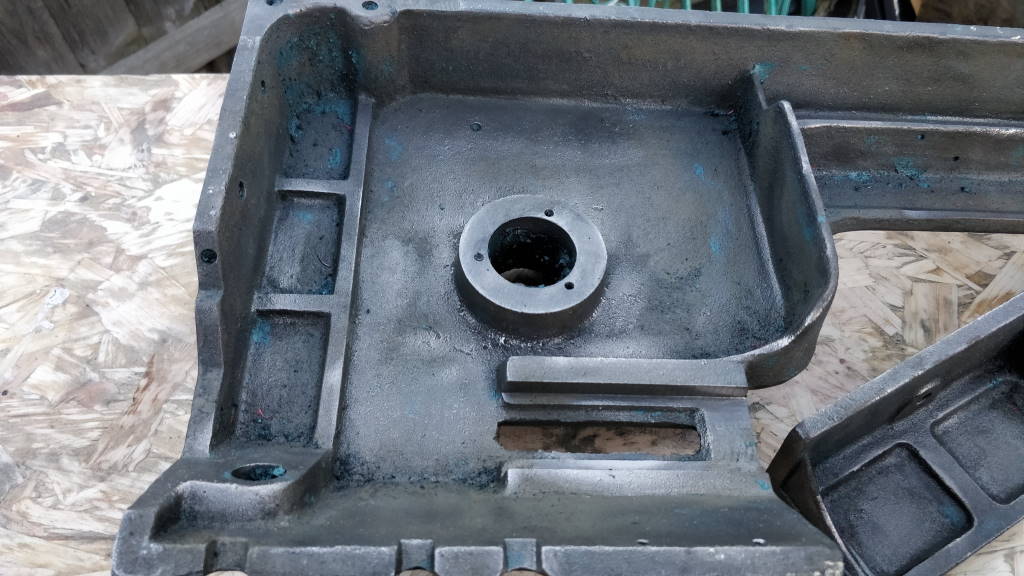 |
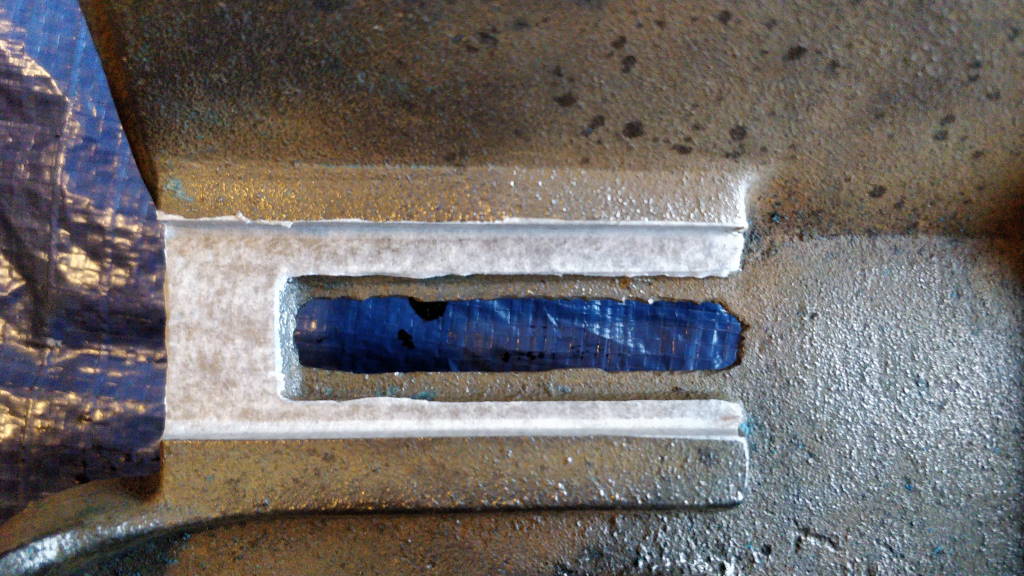
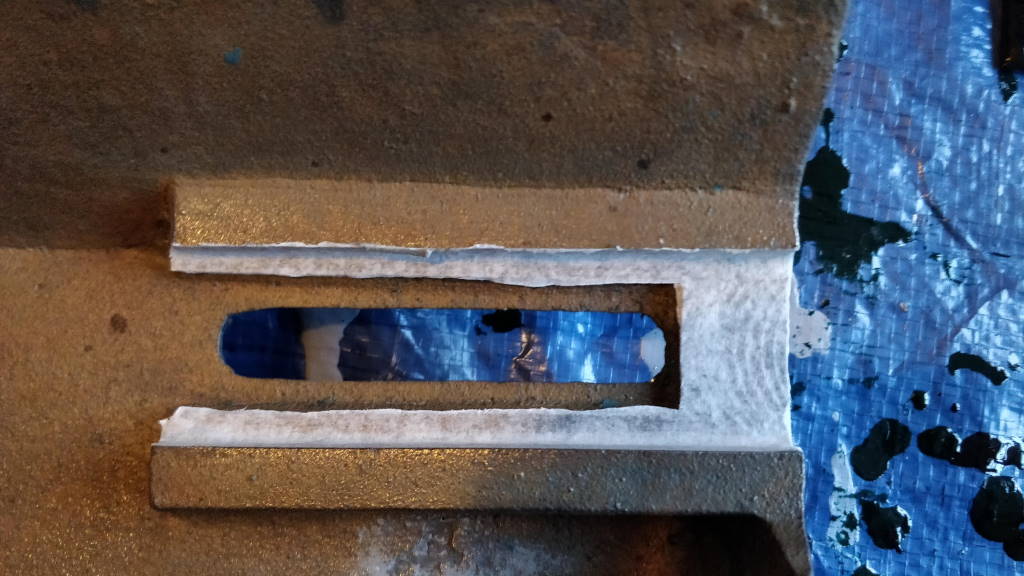
The paint stripper is very, very effective. It has a consistency similar to very thick custard and sticks to the surfaces regardless of the orientation (i.e. it doesn't drip off). Within a few seconds of being applied, the paint bubbles up and comes off with very little effort. The two photos above show the same part of the bandsaw before and after applying a single coat of the paint stripper.
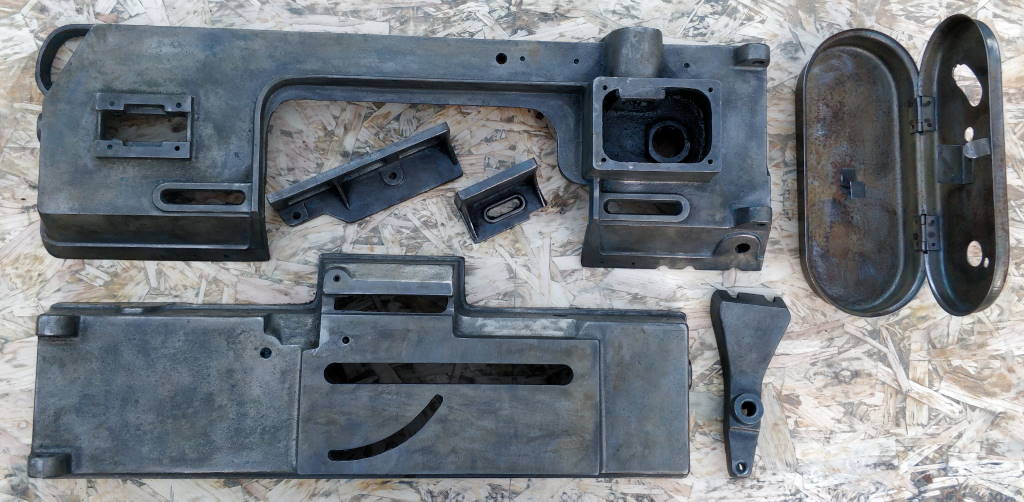 |
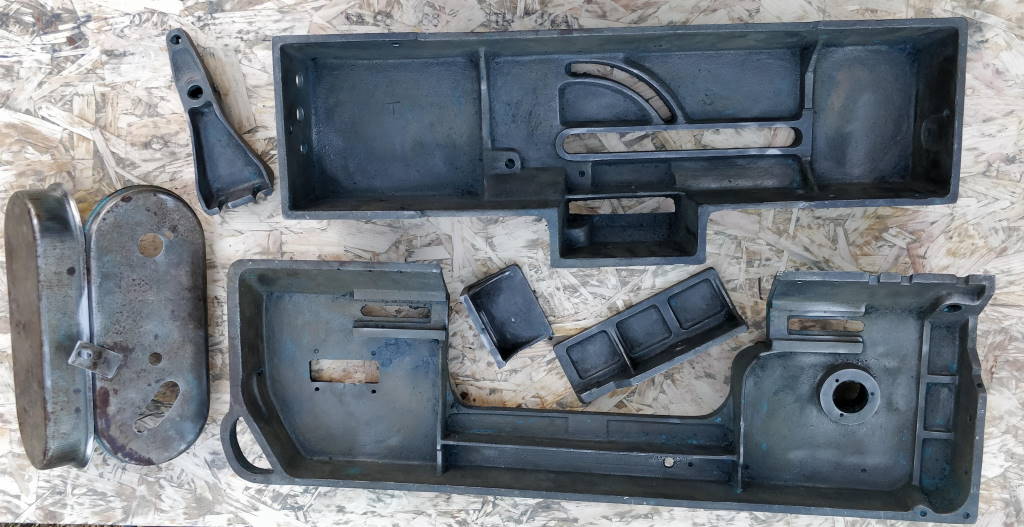
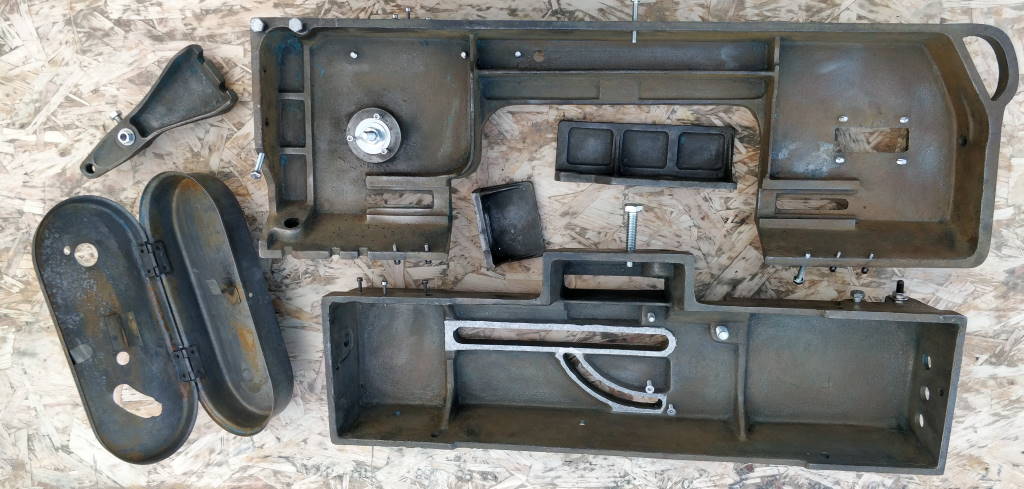
This photo shows a view of the top of all the parts from which I removed the paint. The belt cover has a lot of surface rust, especially on the inside, but the other parts look okay with the paint removed.
 |
This photo shows a view of the bottom of all the parts from which I removed the paint.
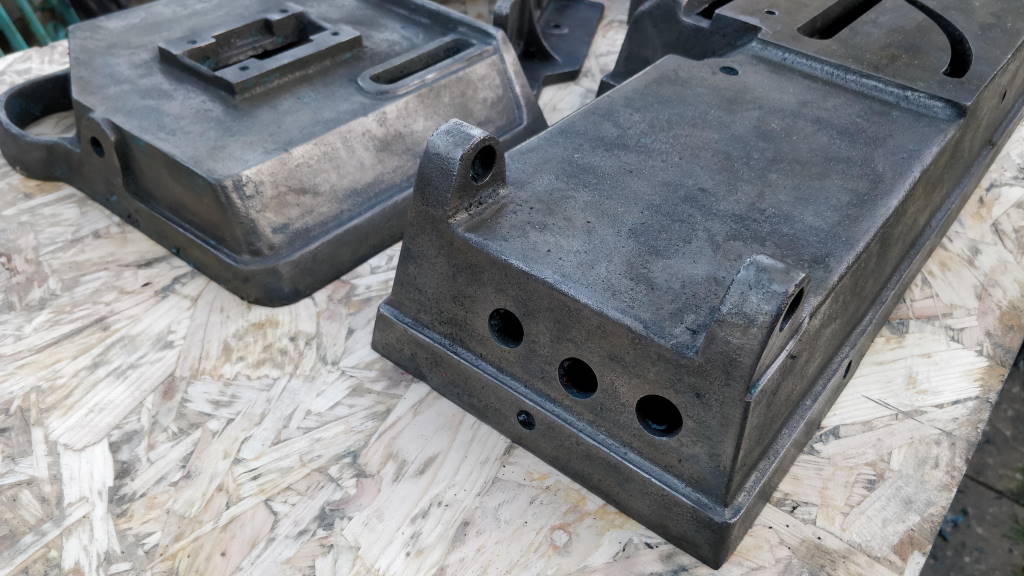 | 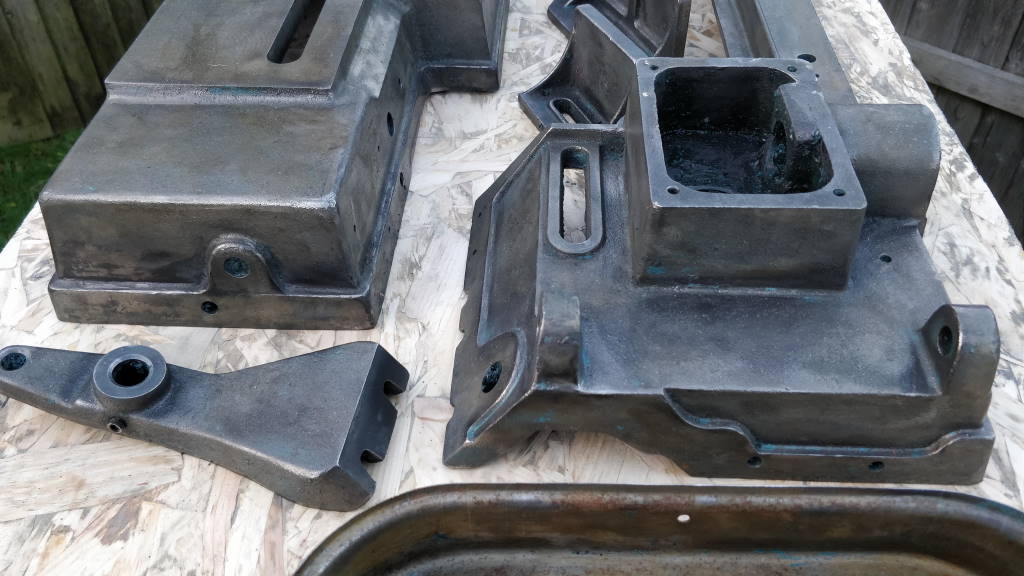 |
These two photos show a close up of the ends of the main parts.
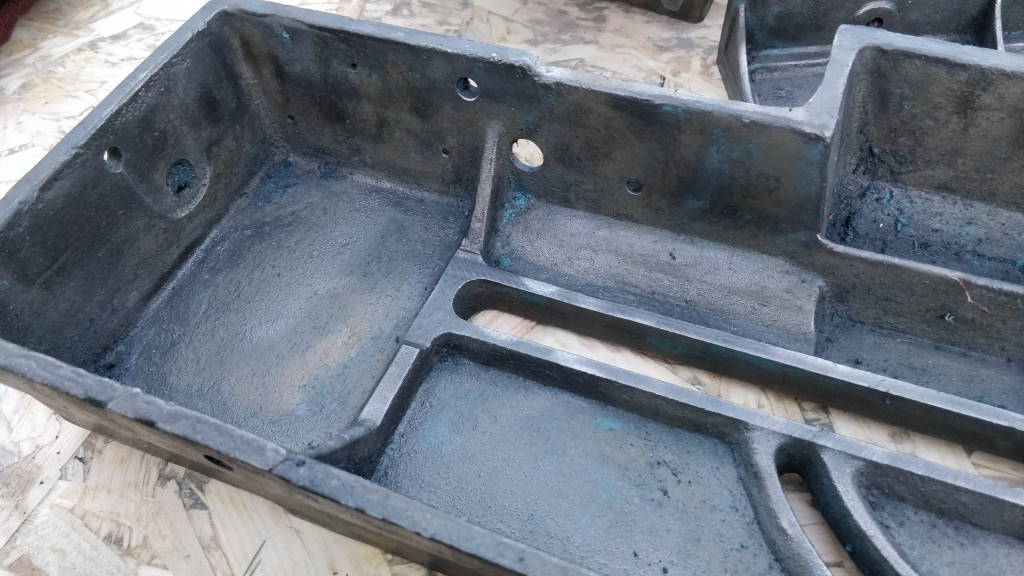 |
This photo shows a close-up of the inside of the bottom casting. There are a few places where the original paint has remained. I'm sure I could have got rid of it with some careful and localised application of more paint stripper, but I decided to leave it as it was.
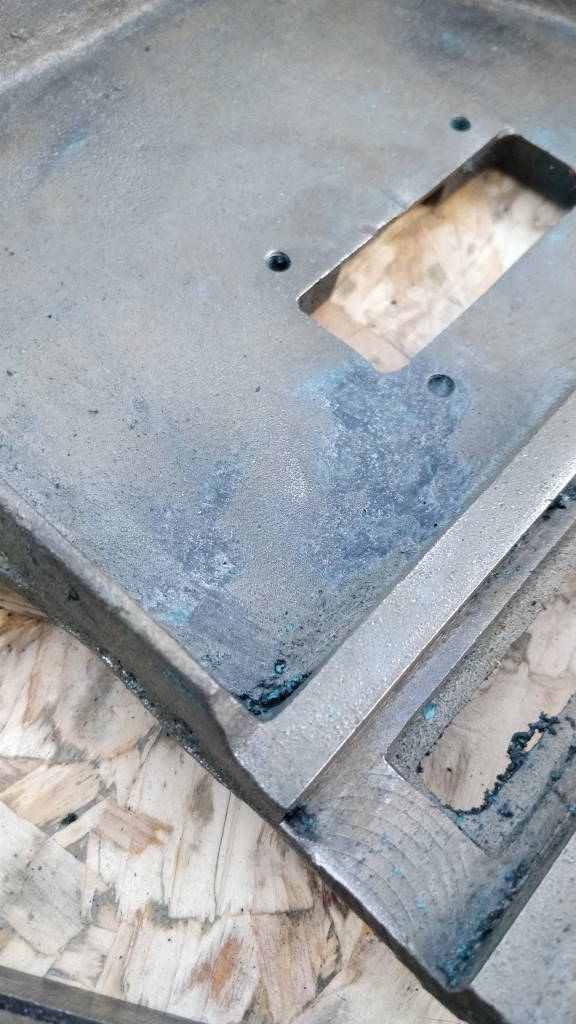 |
This photo shows a close-up of the inside of the top casting. Below the opening for the blade adjuster, you can see an area where the casting has been filled as part of the original manufacturing process.
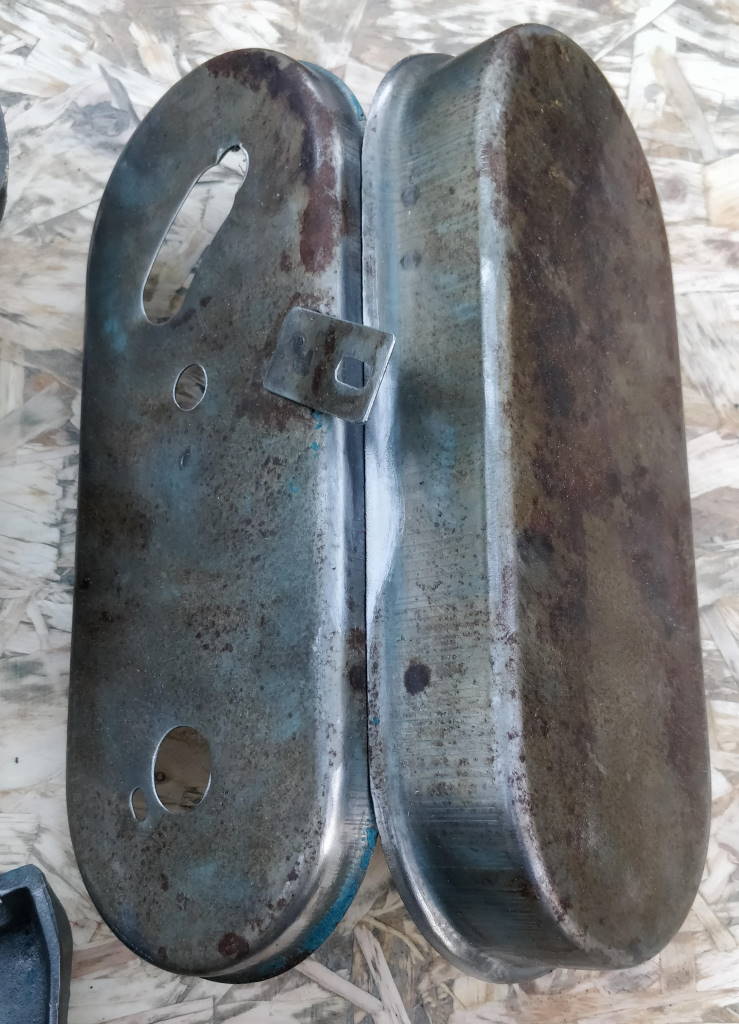 | 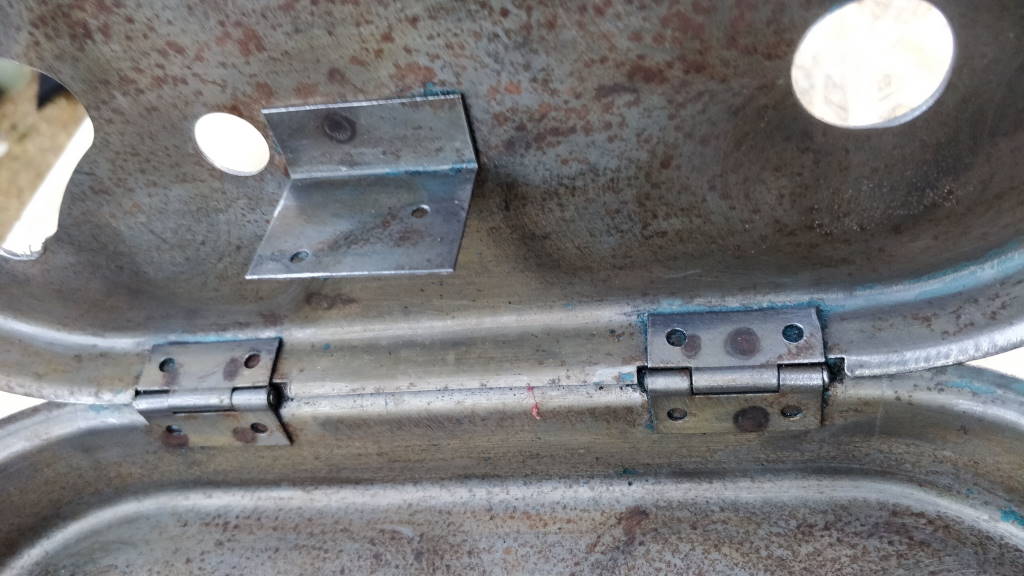 |
These two photos show the belt cover. The rust on this part can be seen. I removed this by soaking the belt cover in a solution of citric acid powder and hot water (about four full kettle's worth) and leaving it for a few hours. As the rust was relatively thin, that was sufficient to remove most of it.
Masking
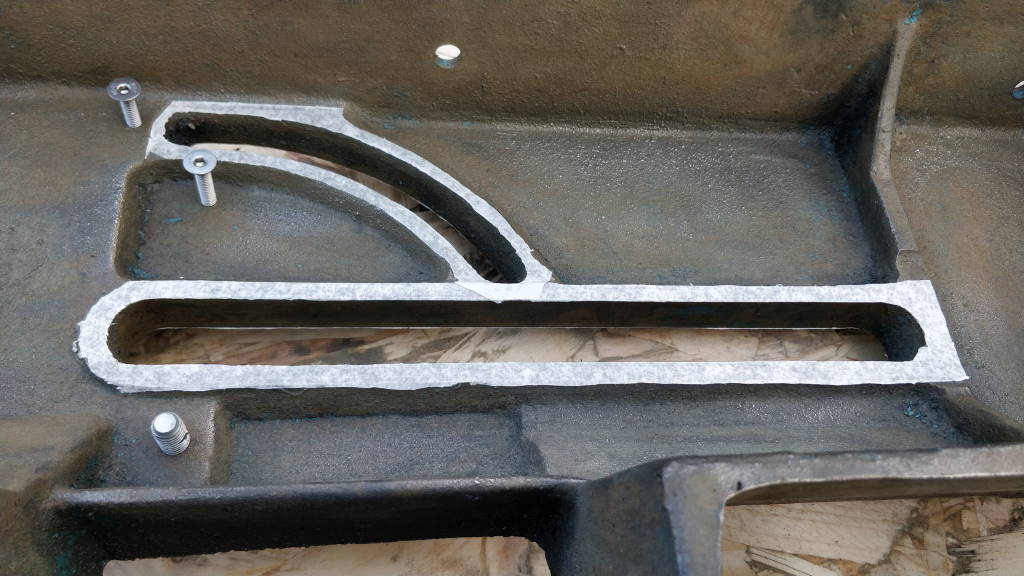 |
To protect the important machined surfaces from paint, I covered every flat surface that I felt was important with masking tape. Many of these surfaces (like the ones shown in the photo above) involved some quite careful cutting of the tape to just cover the required area. Where there were threaded holes, I fitted "sacrificial" screws into the threads to keep the paint out of the threads. Where available, I used hex-head screws for these as they would be more straightforward to remove when covered in paint. In some areas I didn't have hex-head screws of the right size so used socket-head screws. Since they protrude a long way from the holes, I could remove these with some mole-grips (aka vice grips or locking pliers) on the head if the socket got filled with paint.
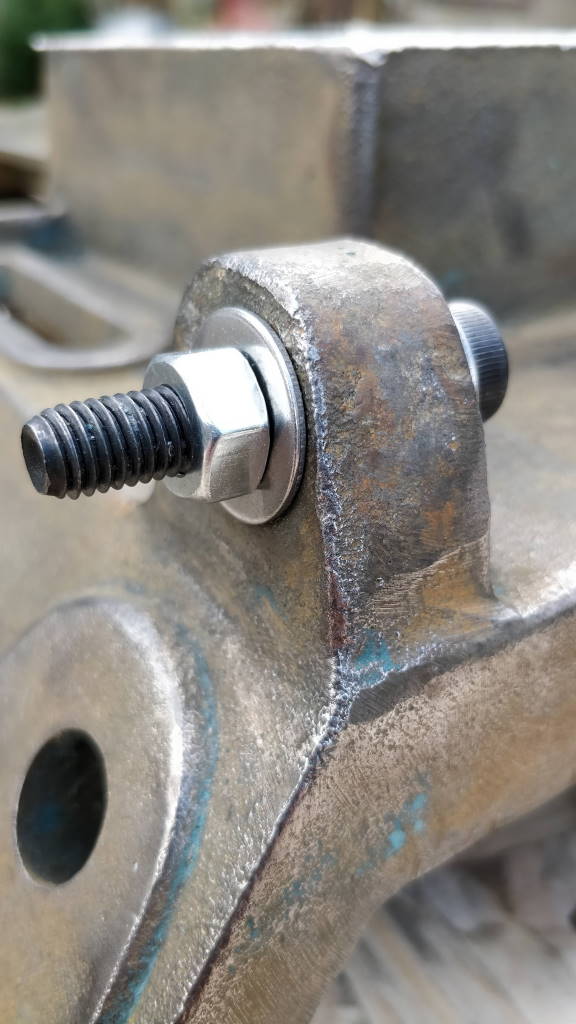 |
Where there were important bores (such as the ones in which the main hinge runs), I protected them from paint using penny washers and screws, as shown in the photo above.
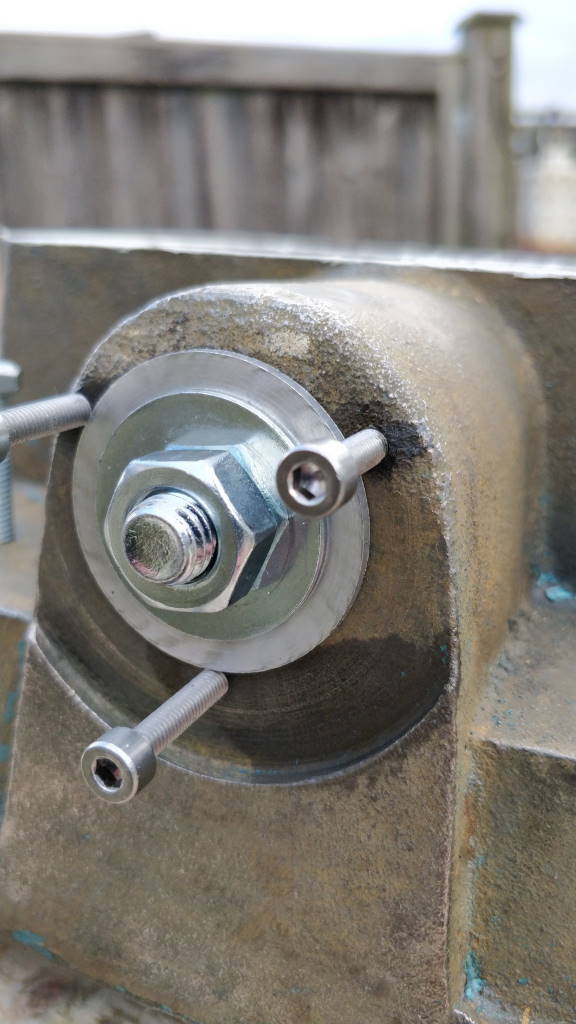 | 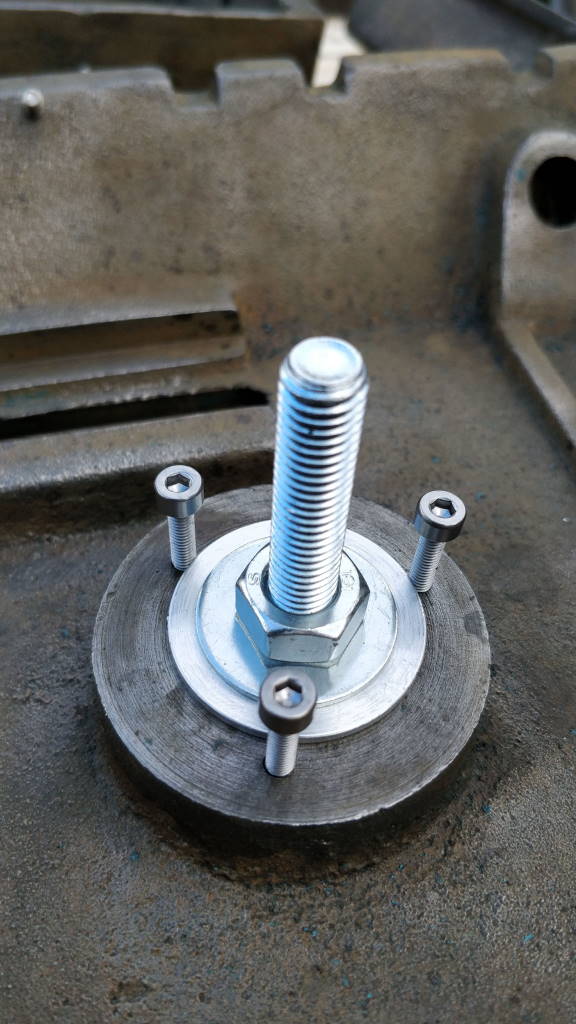 |
For the gearbox bearing bores, I made some custom 38 mm diameter, 2 mm thick aluminium washers and held these in place with M10 screws. The diameter was chosen as the washers just fit inside the three screws that are used to mount the bearing retention plate as you can see in these photos.
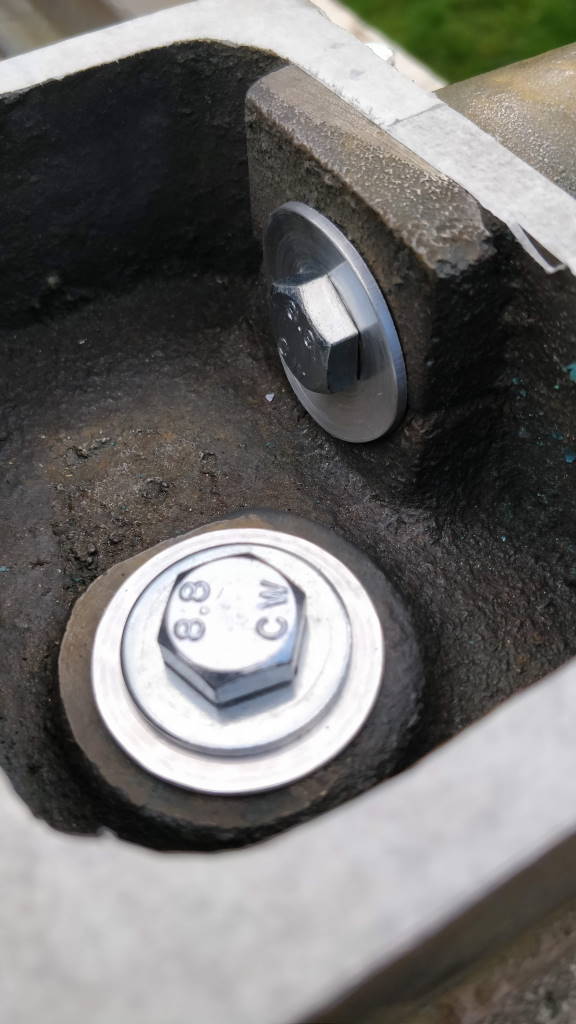 |
This photo shows the inside of the gear box and the aluminium washers in place. The reason for choosing a soft material like aluminium for the washers is that the casting is not flat, especially in the case of the face of the worm-shaft bore, shown at the top of this photo. The aluminium washer bends as the screw is tightened and follows the shape of the casting.
 |  |
These two photos (click for bigger!) show all of the parts masked and (almost) ready for painting. After taking these photos, I realised that:
- The hinge hole on the upper casting (visible in the bottom-left of the casting in the right-hand photo) hadn't been masked.
- The machined surfaces that the blade guides run on (shown at the bottom of the top casting in the right-hand photo) hadn't been masked.
- The cast surfaces that the blade guide screws run on (shown at the bottom of the top casting on the left-hand photo) would be better as a machined surface and also masked).
 |  |
These photos show the blade guide surfaces with masking added.
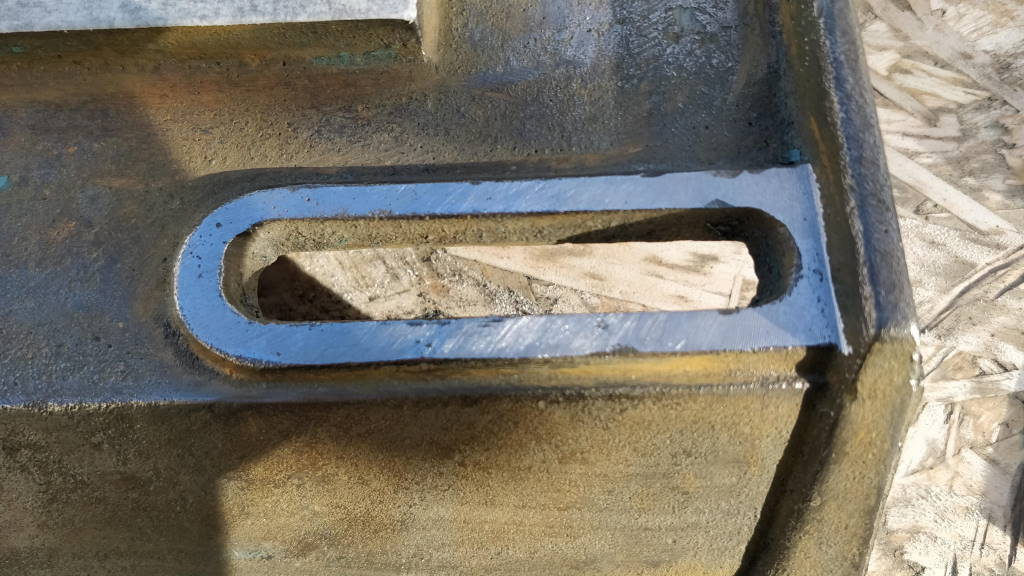 | 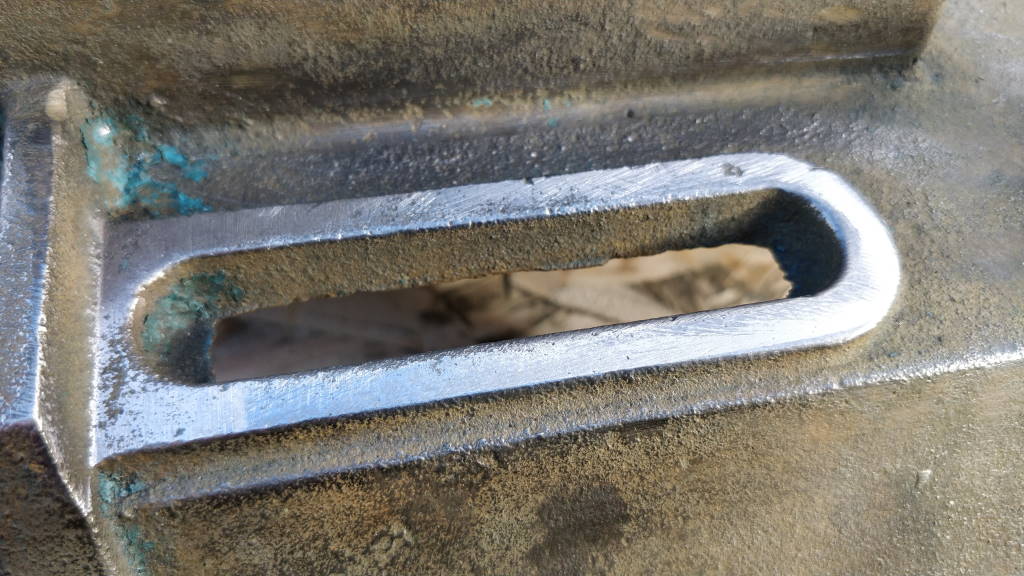 |
Rather than trying to come up with a good way of mounting the top casting and machining the faces that the blade guide screws run on, I decided to simply clean these up with a hand file. These photos show the filed surfaces.
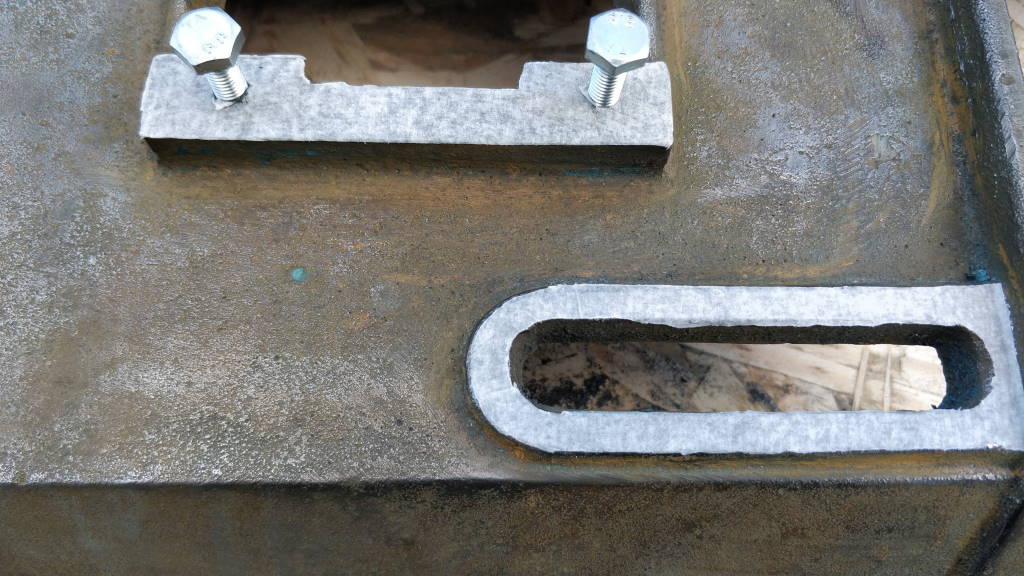 | 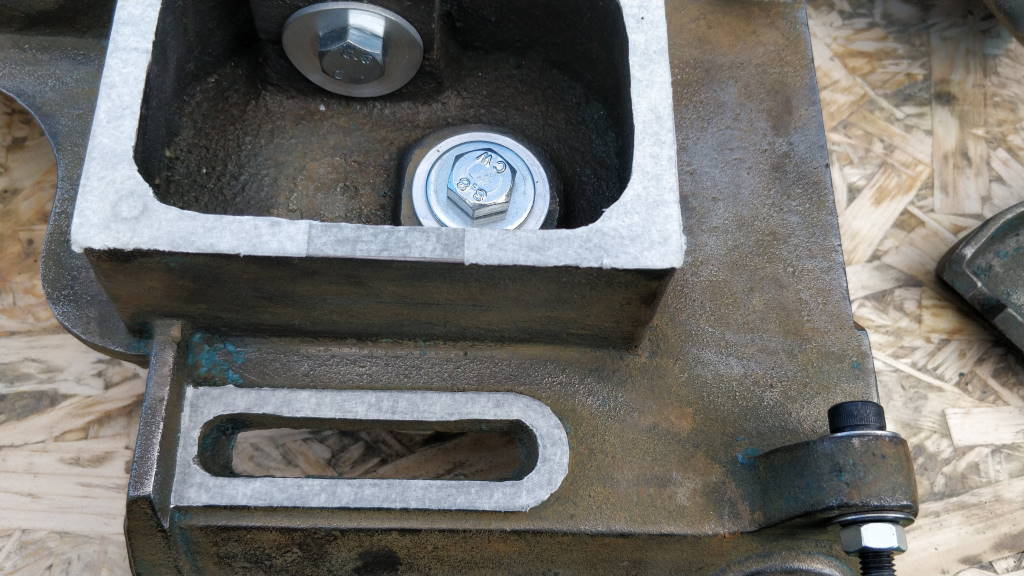 |
These photos show them with masking tape applied.
Priming
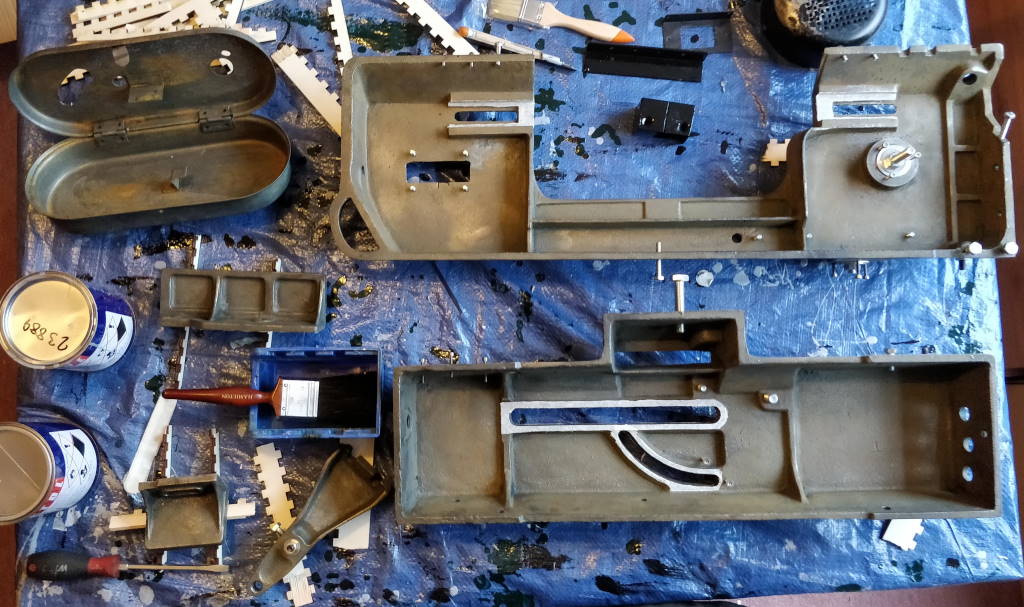 | 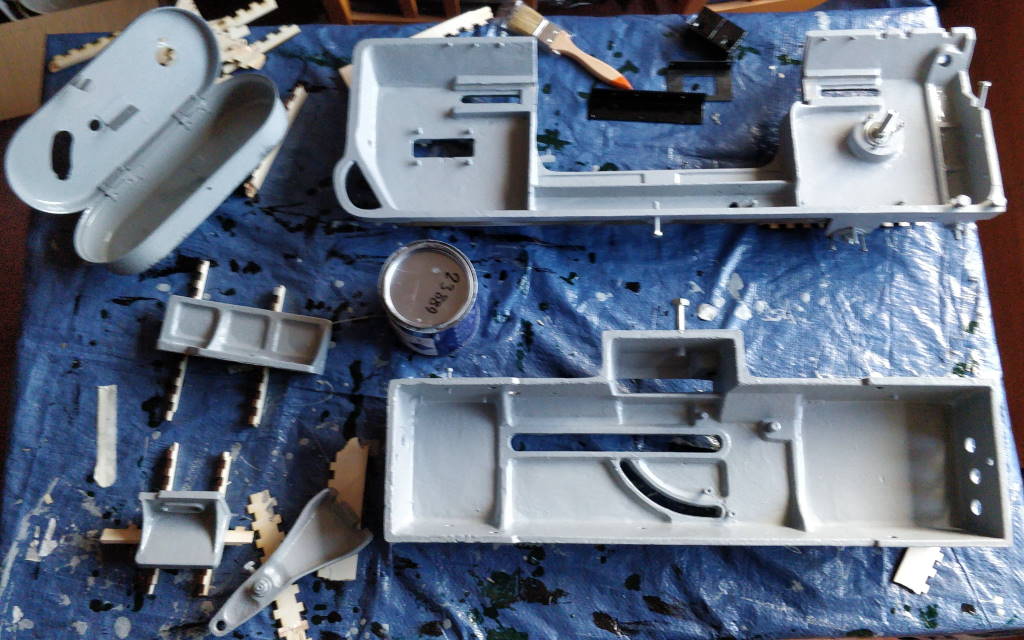 |
Here you can see the parts before and after the first coat of primer (I used Tractol 816 light grey primer, applied with a brush). One coat of primer seemed to be sufficient.
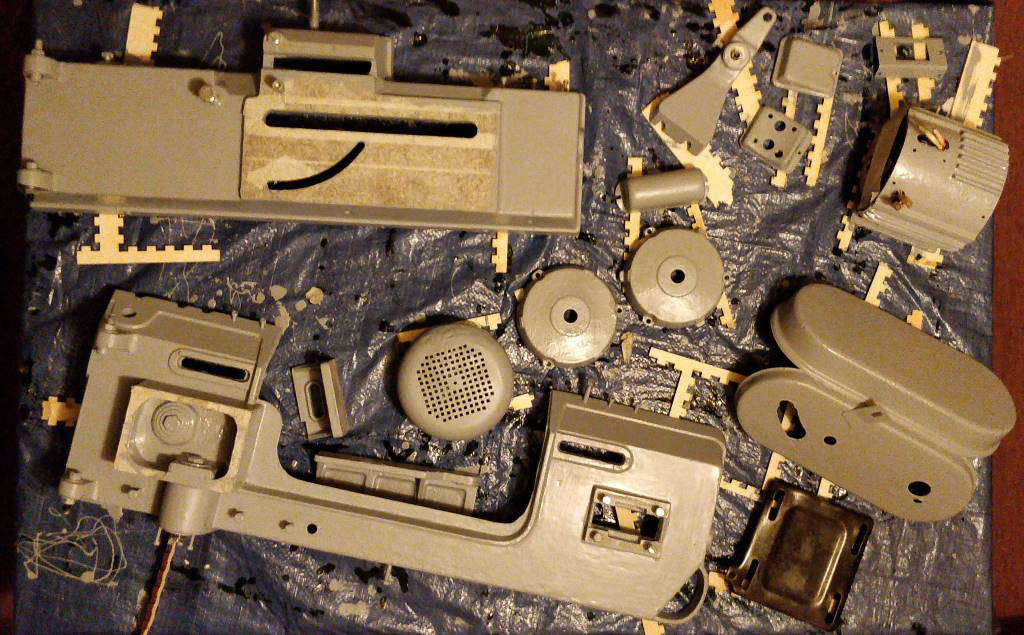 |
Here you can see the parts after they'd been turned over for the coat of primer on the other side. At this point I had decided to also paint the motor, so you can see the dismantled motor parts with their coat of primer applied.
Painting
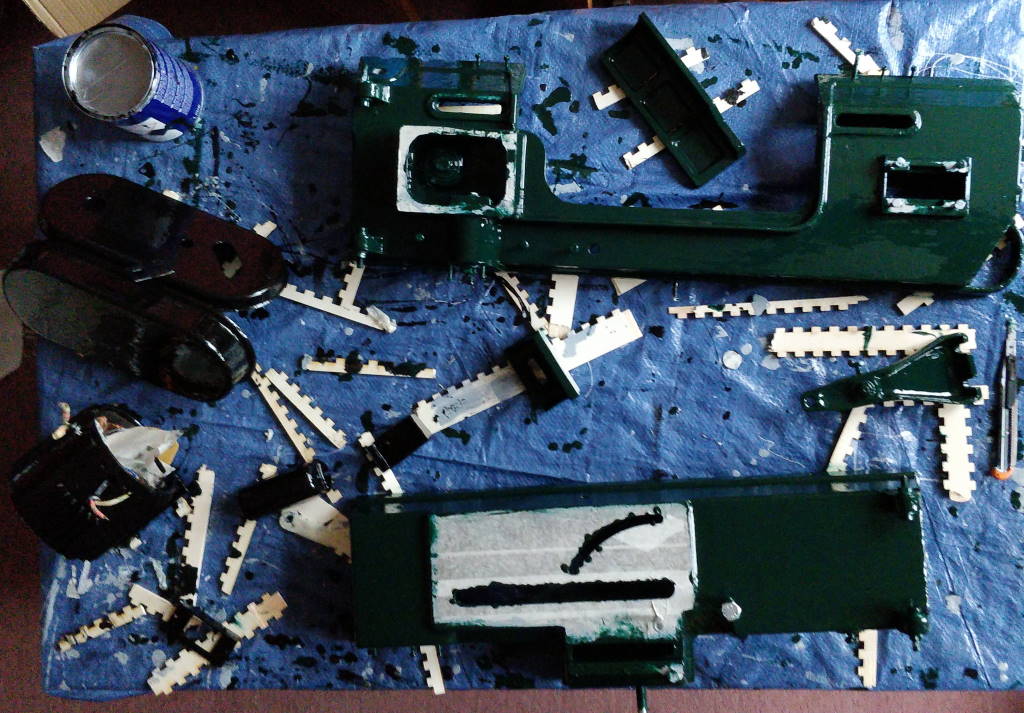 | 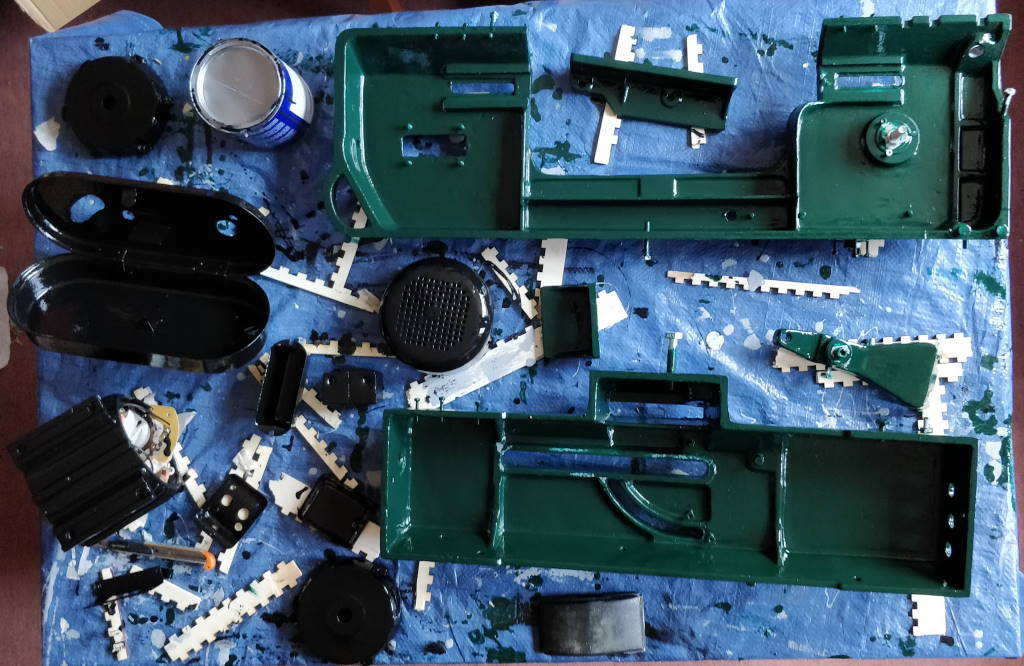 |
These photos show the masked parts after they'd all had two coats of Tractol British Racing Green or Black paint. Like the primer coat, each coat was done in two goes: one in each of the orientations shown in the photos. Painting is something I don't have any real experience with and from feedback I received it would have been better to thin the Tractol paint a bit rather than just letting it form a coat in its natural thickness.
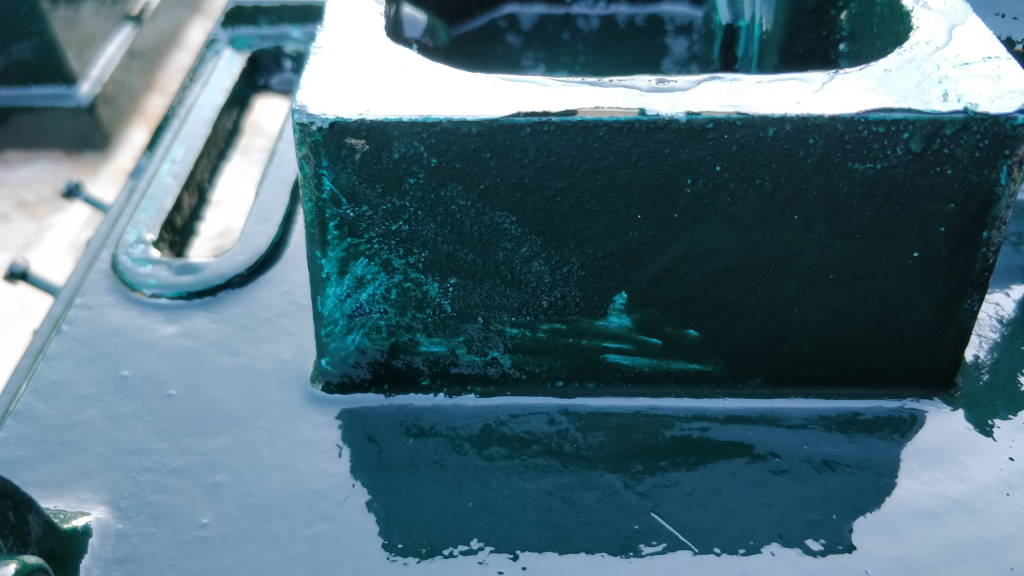 | 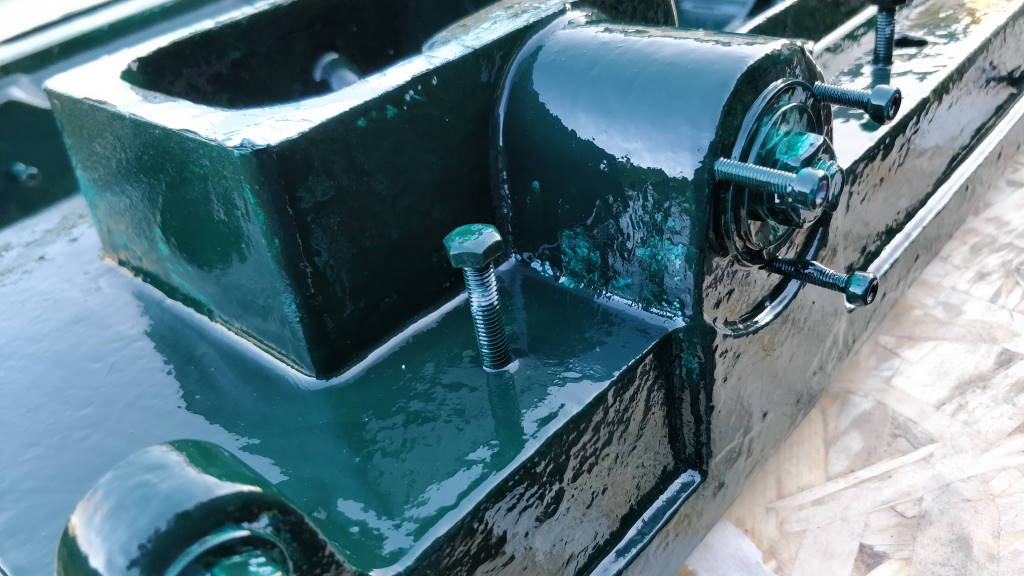 |
These photos show a couple of areas where the paint finish left a bit to be desired. This wasn't obvious in the relative darkness of the dining room (where I did all the painting). Nevertheless, I decided to leave it as is on the premise that the finish was likely to be damaged during assembly and I could touch up areas where necessary when the bandsaw was complete.
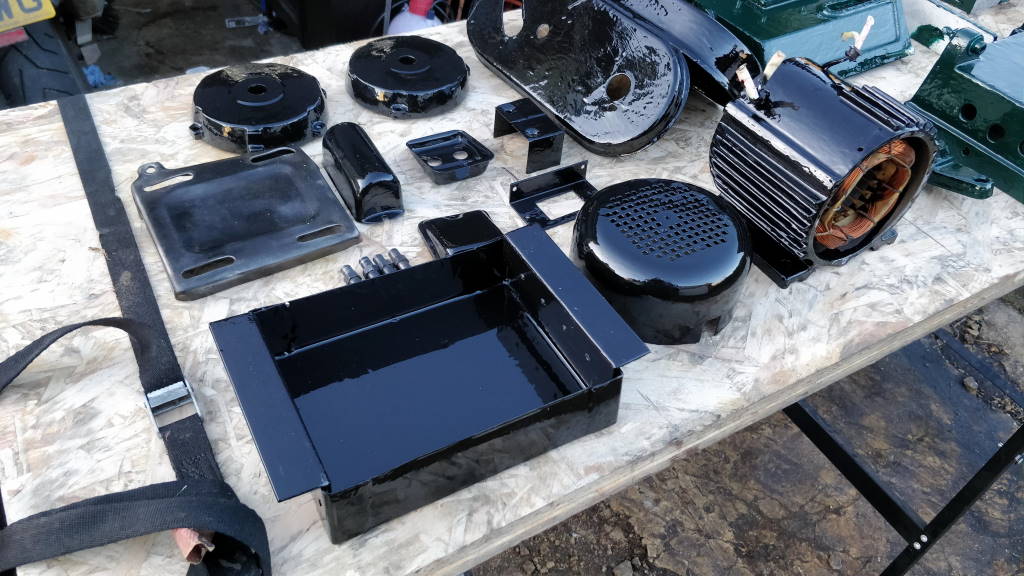 | 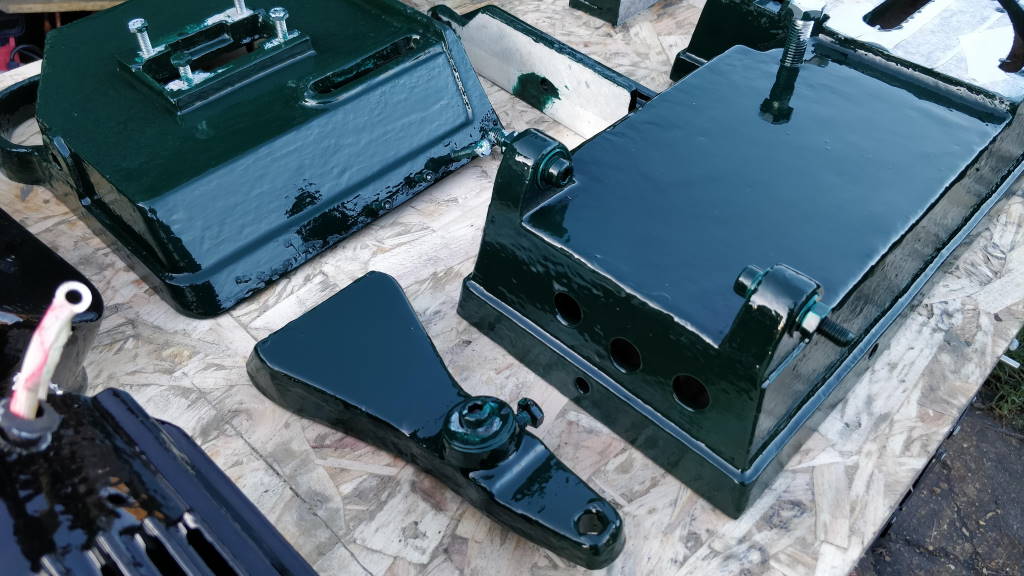 |
These somewhat gratuitous shots show some more views of the painted parts. Click on them if you'd like a closer look.
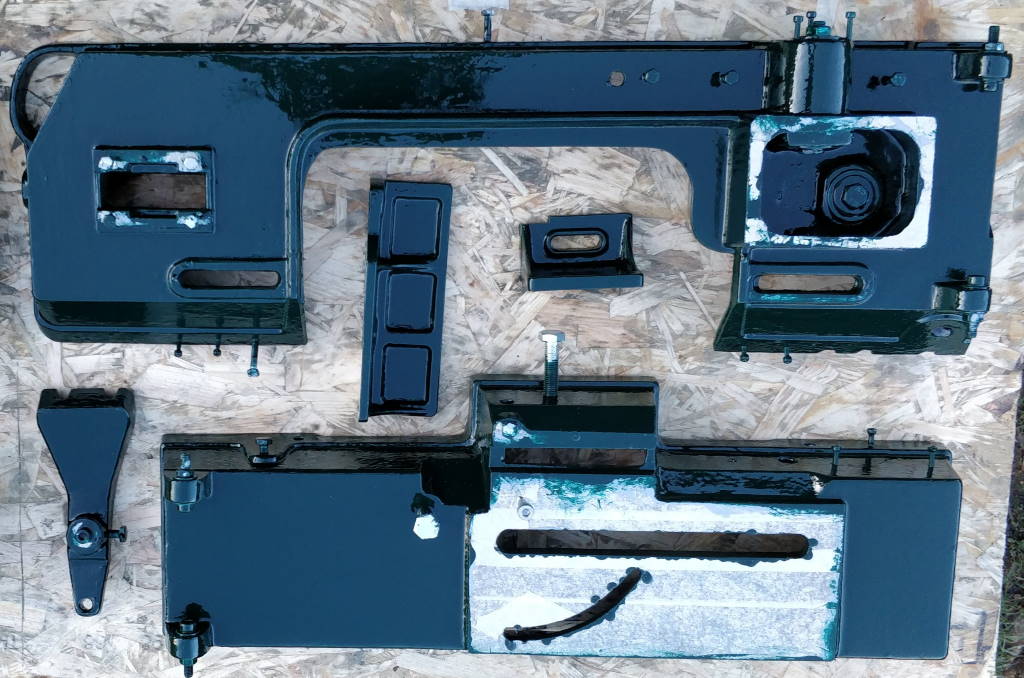 |
This photo gives a better view of all of the green painted parts prior to the masks being removed.
Removing Masking Tape and Screws
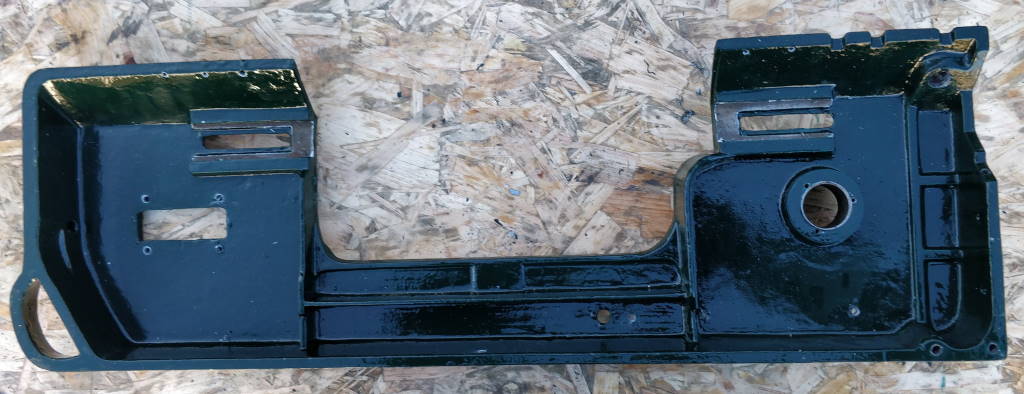 | 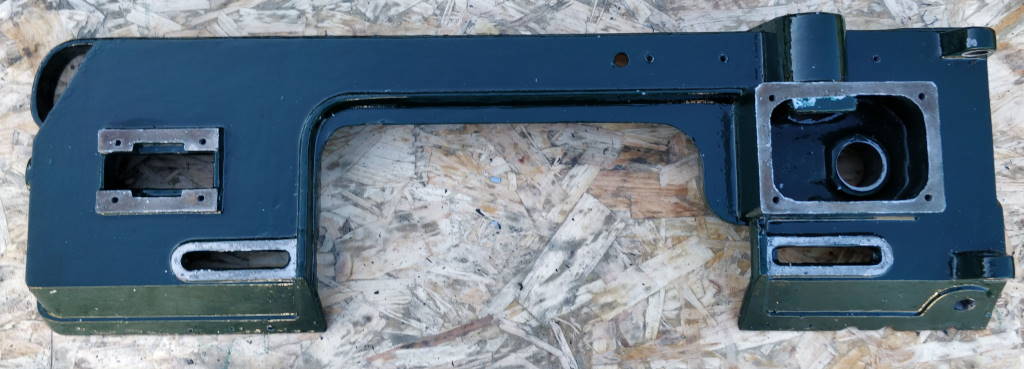 |
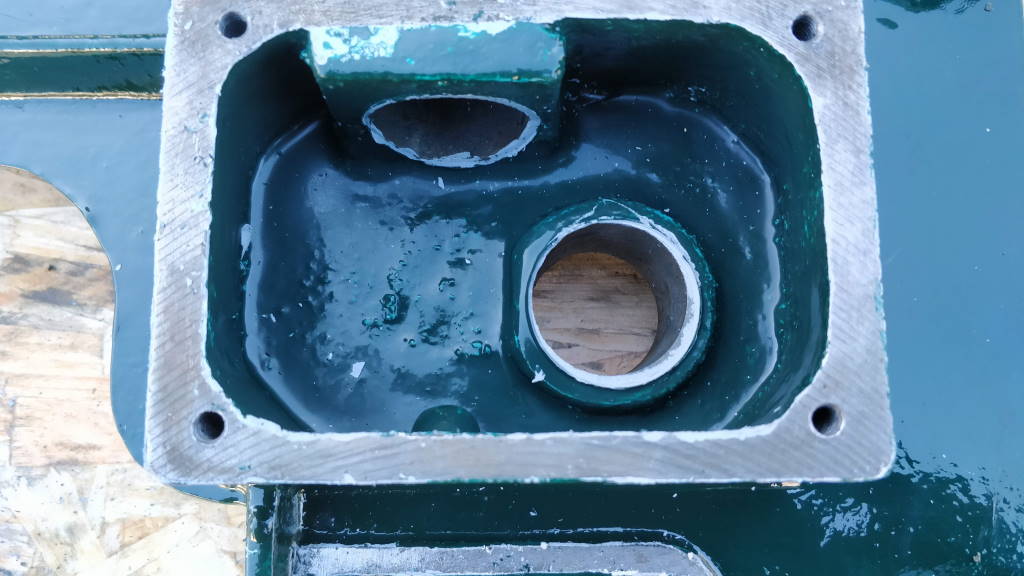
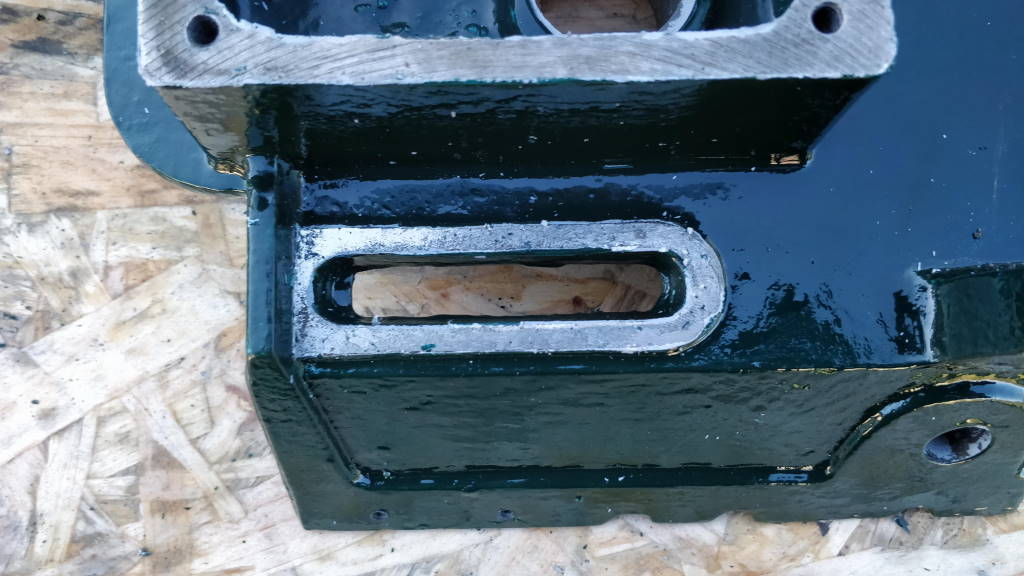
These photos show what the upper casting looked like once all the masking tape and the masking screws had been removed. When I took these photos I'd forgotten to remove the masking tape on the inside of the blade guide mounting areas, but you can see the result of cleaning that area in the following close-up photos.
 |  |
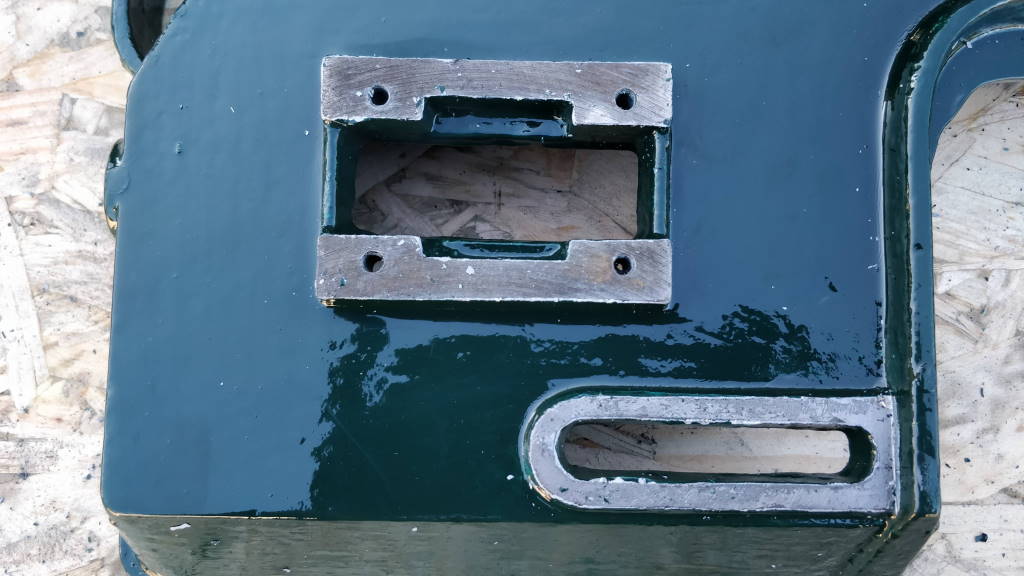 | 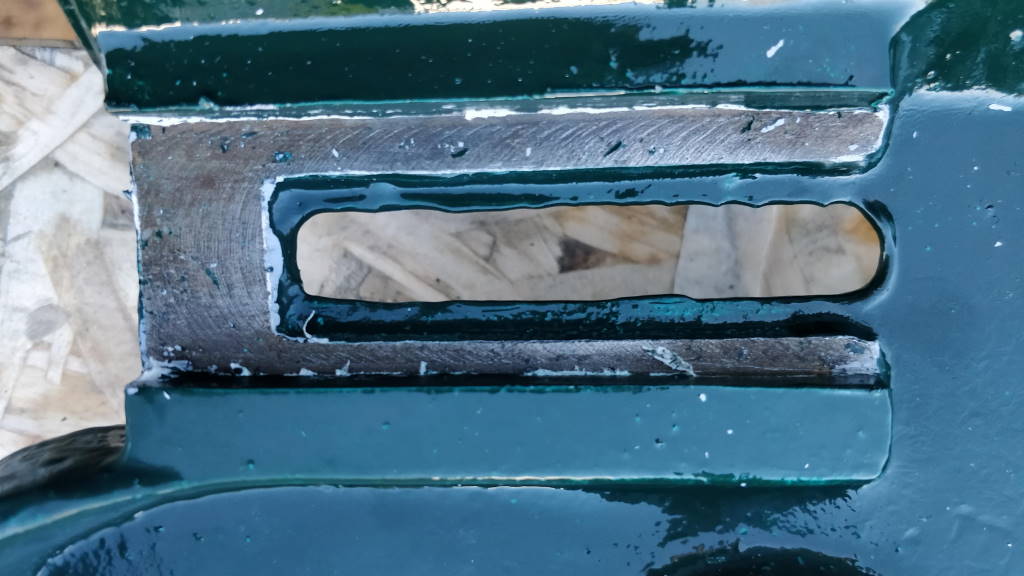 |
These photos show a close-up of the condition of the casting after the masking tape was removed from the key machined surfaces.
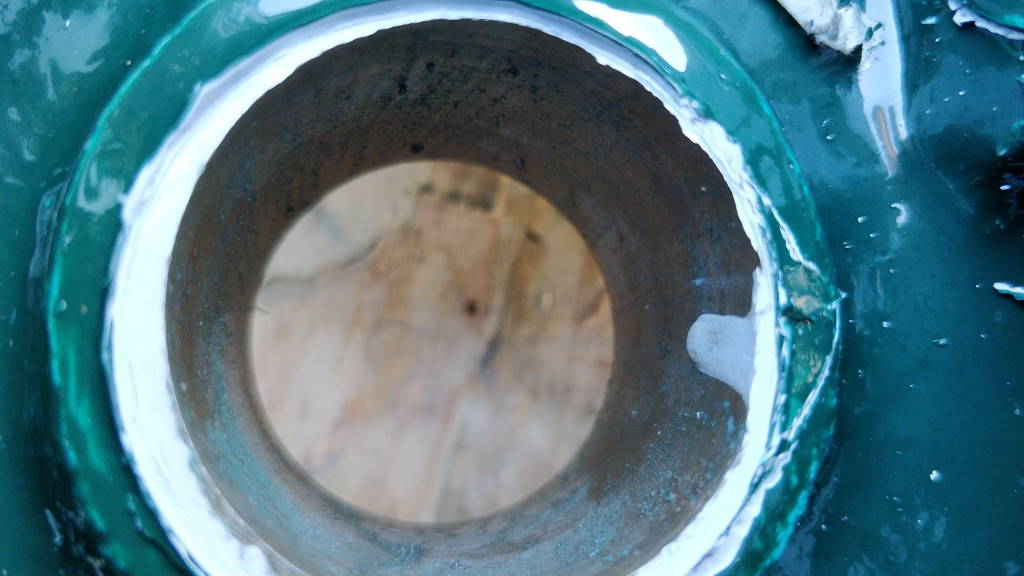 |
The mask on the worm shaft bore didn't work perfectly: in this photo you can see where a drip of paint has made it into the bore. This was relatively minor and was easily removed by scraping.
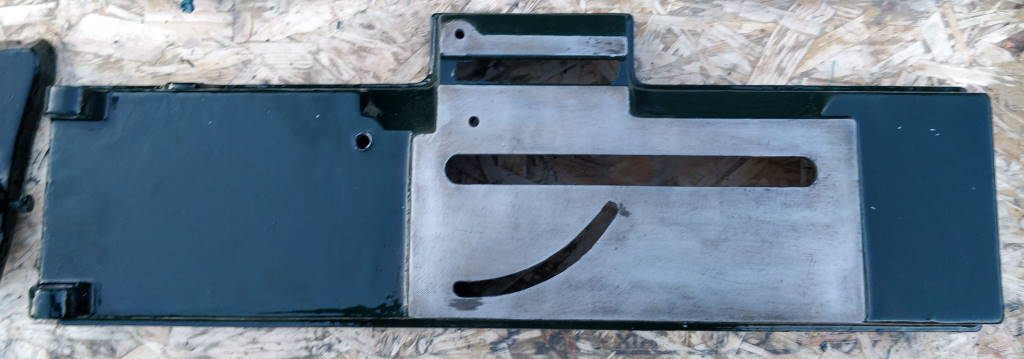 |
This photo shows the finish on the lower casting.
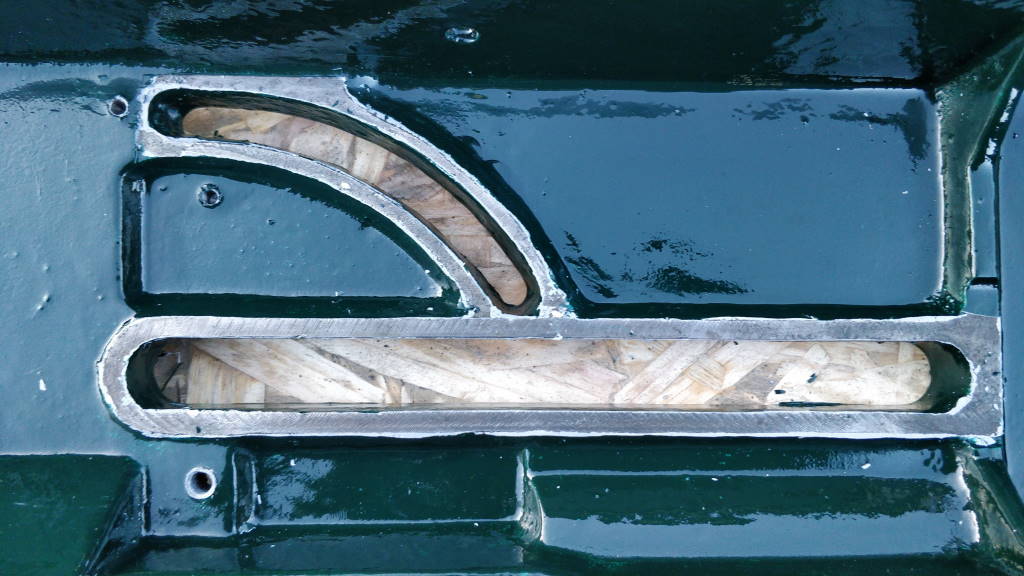 | 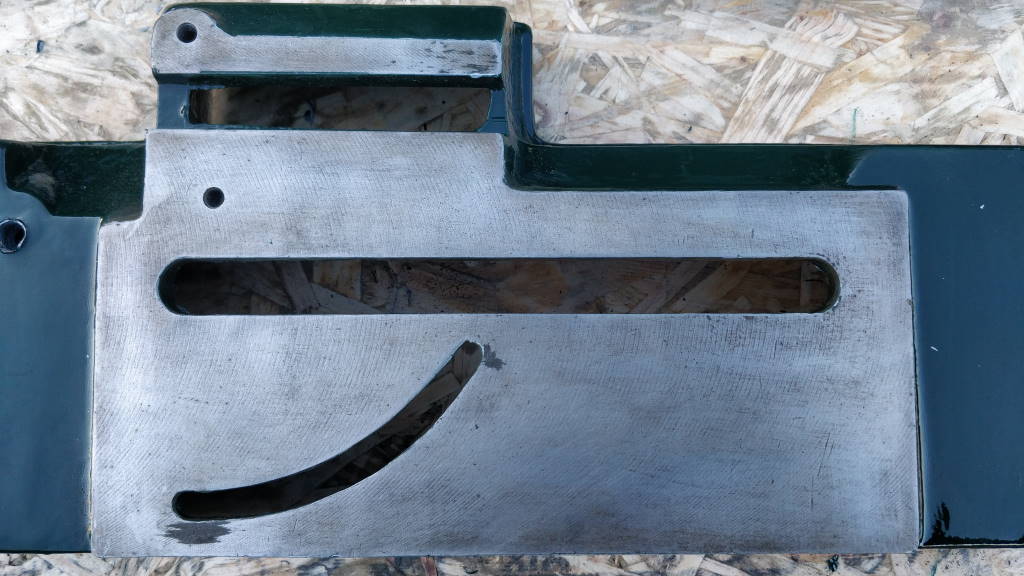 |
These photos show close-ups of the machined areas on the lower casting. In general I was very pleased with the result.
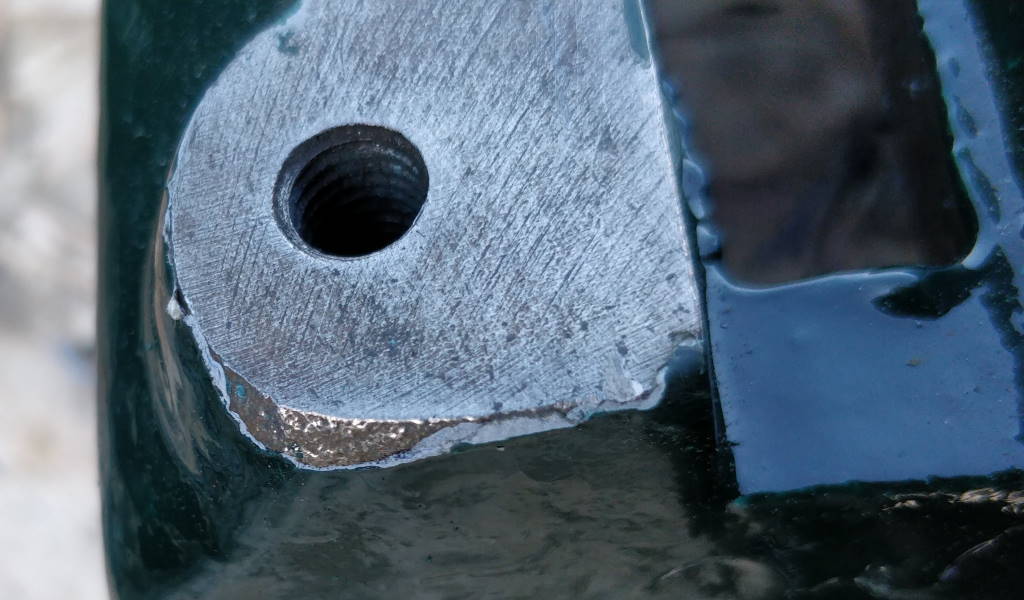 |
The mask didn't work especially well in this area: the paint was removed on the side of the casting rather than just on the top.
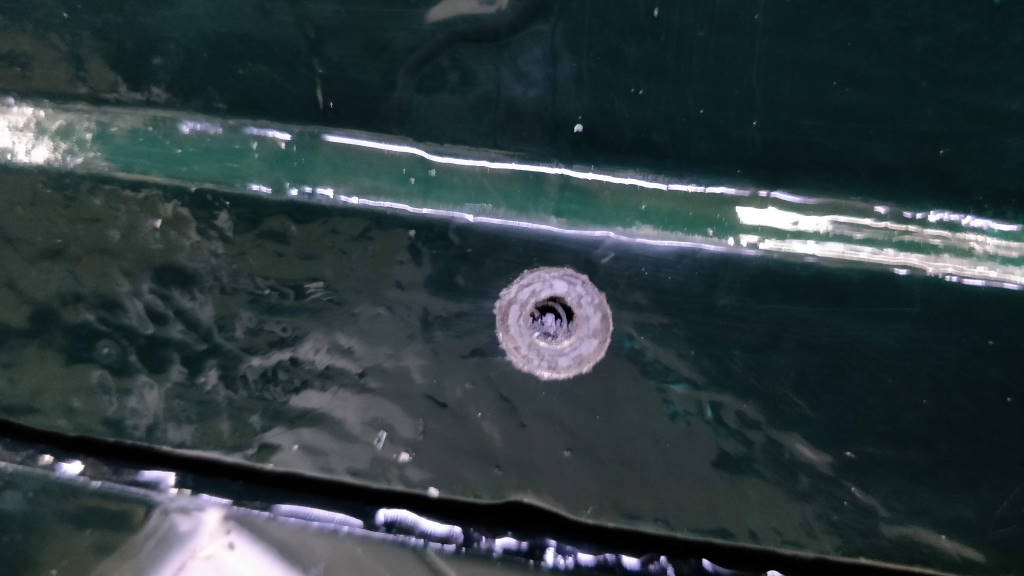 |
This shows the earth point (which is behind the switch housing on the lower casting). To remove the paint from this area, a counterbore was used as a scraper: the counterbore was held by hand and inserted into the threaded hole. It was then gradually turned by hand until the paint was sufficiently removed.
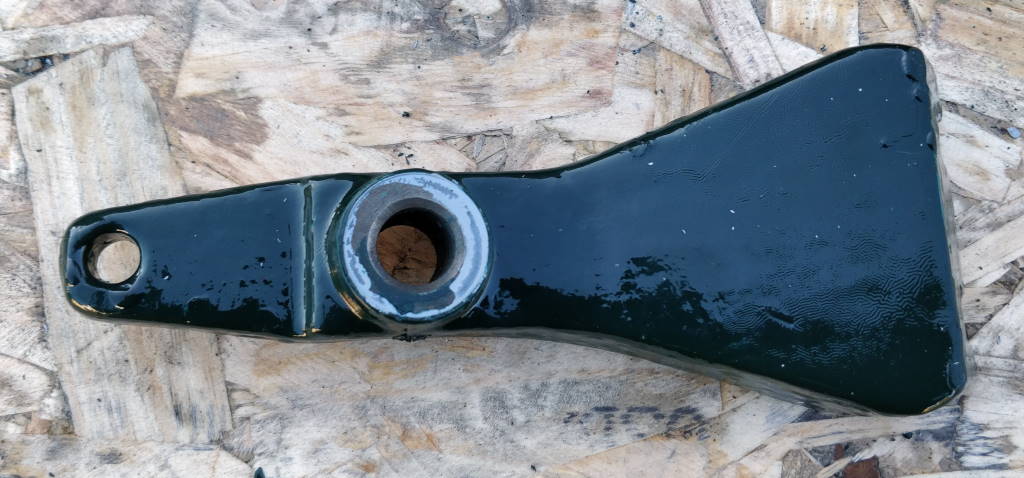 | 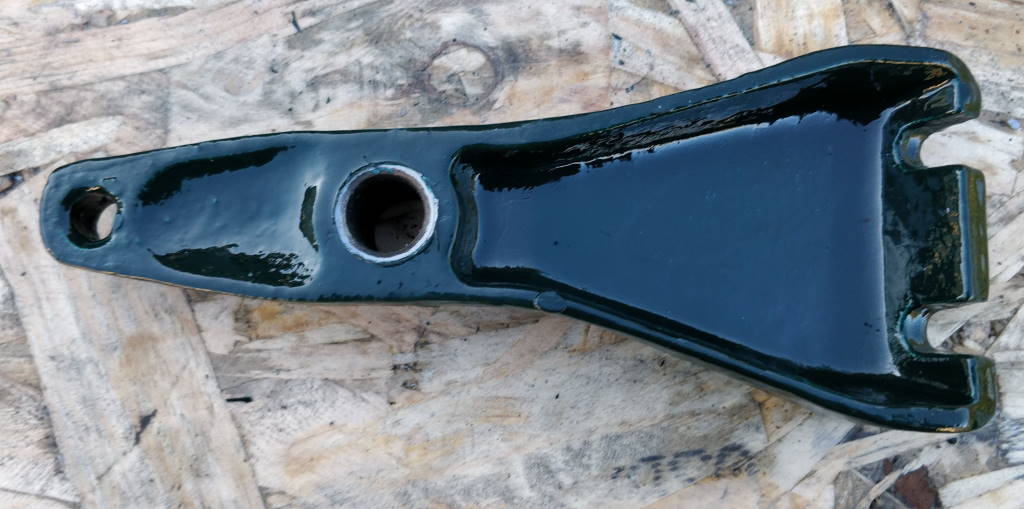 |
This shows the spring bracket after removing the masking. The finish around the hinge bore isn't perfect, but the bore was kept clean, which was the primary goal.
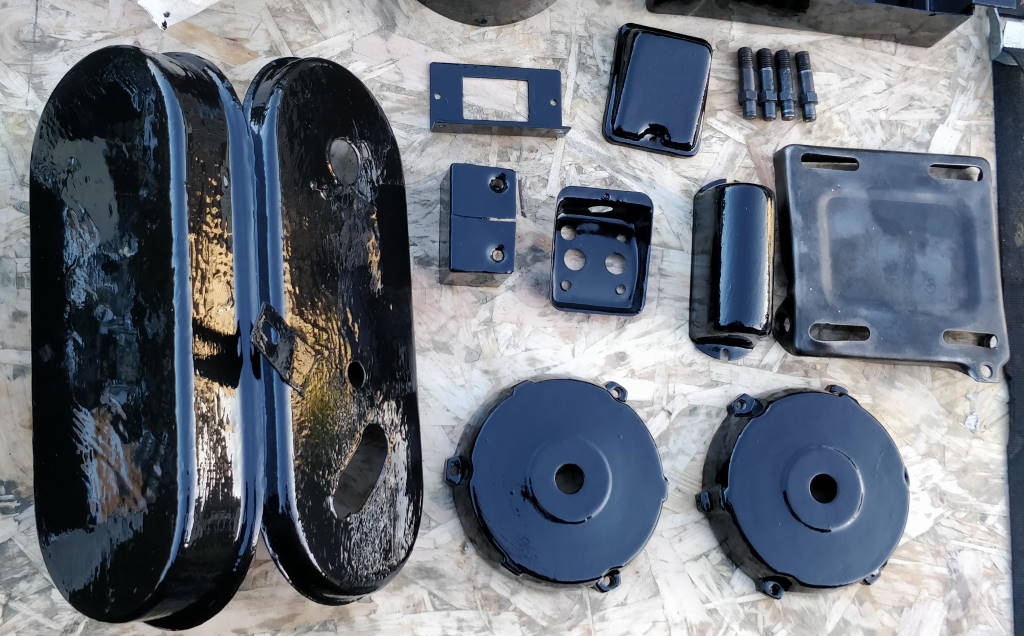 | 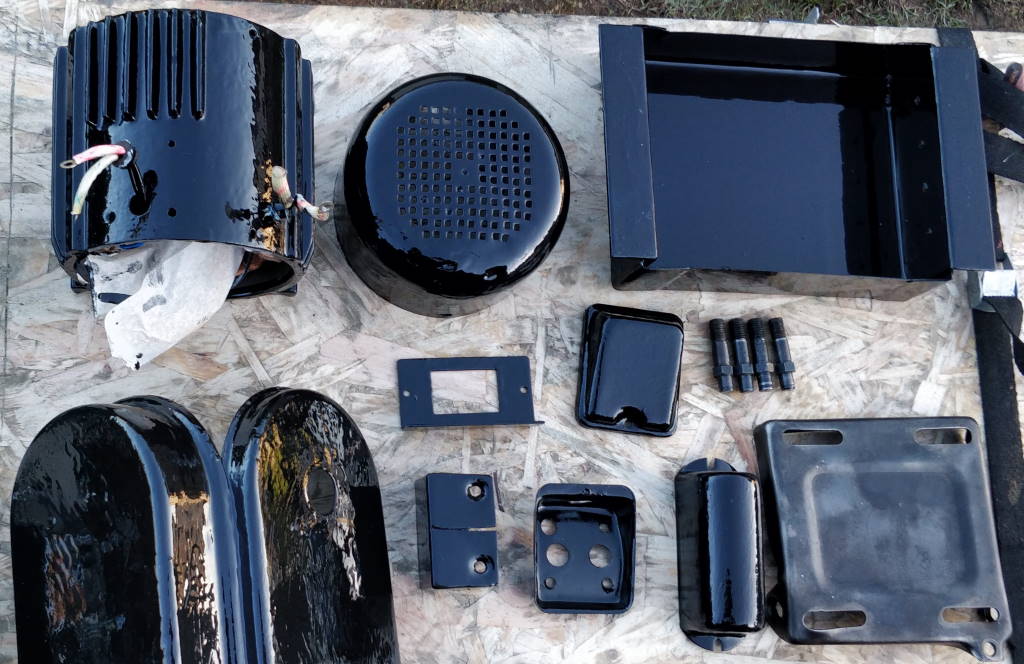 |
These photos show all the black painted parts (and the unpainted motor hinge bracket and eccentric screws).
In general I was relatively happy with the results of painting. Painting is a job that I don't enjoy at all. I'd probably do better if I had a good area where I could spray paint large objects (I have done some limited amounts of spray painting outside when the wind is light, but this is quite restrictive). As my first experience of painting rather awkwardly shaped bits of metal, I think the results could have been a lot worse!
This website is free, but costs me money to run. If you'd like to support this site, please consider making a small donation or sending me a message to let me know what you liked or found useful.