Electrical Connections
 |
When rebuilding the bandsaw, one consideration I had was that I wanted to be able to dismantle the bandsaw more easily in the future. As provided, the motor was wired directly to the switch. The wiring goes underneath the base casting and is therefore largely inaccessible. Although the wiring can be disconnected at the motor, the conduit entry is of a difficult-to-remove type and therefore this is not desirable.
I therefore decided to add a junction box to the bandsaw where all components could be connected. The wires to and from the switch go here, so the only under-bandsaw wiring is terminated in an accessible way at each end. The mains power comes in here, so replacing the mains cable for a longer one doesn't require much effort. The motor wire comes in here so removing the motor is straightforward.
Finally, it adds a simple place to add powered ancillaries, such as my bandsaw light.
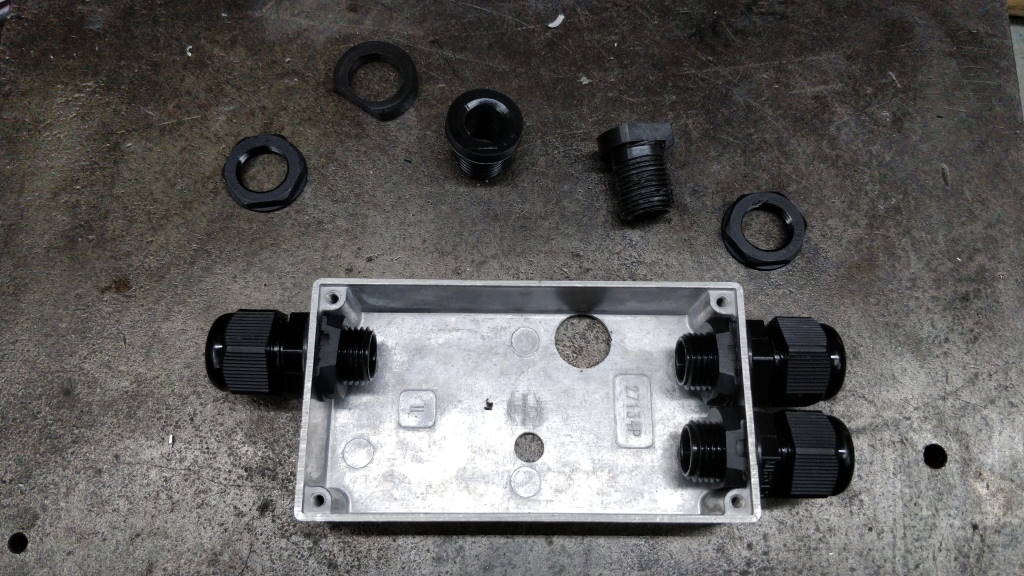
The photo at the top of the page shows the components that were used for the connection box. The box itself is an aluminium die cast box; the conduit entries are M16 ones, bought from RS (the same ones as used in the switch housing).
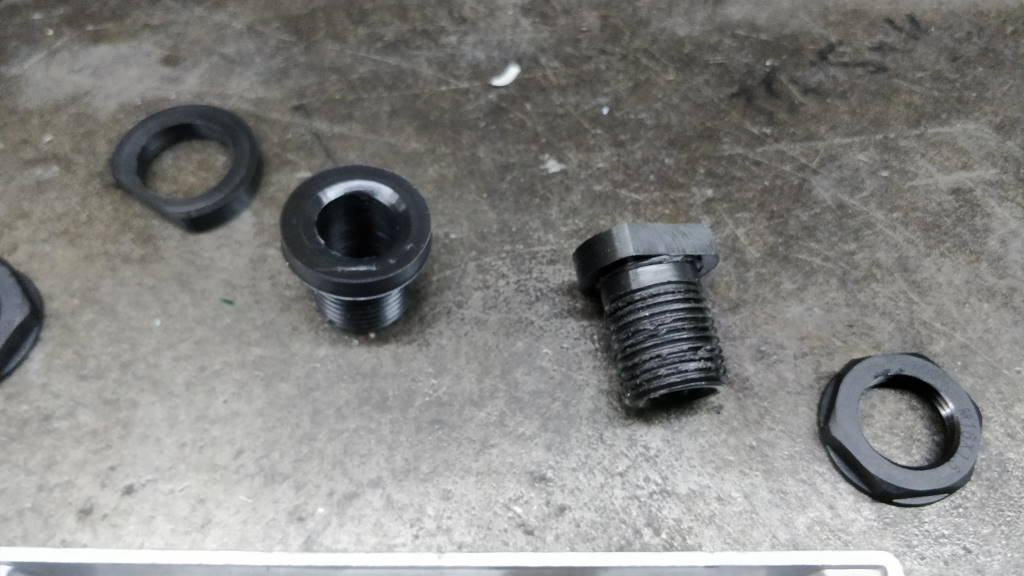 |
These two screws were cut from a bit of nylon bar. They were single-point threaded M16×1.5 and are drilled through 13 mm. One had its head sanded down to form a flat. The nuts were taken from the conduit entries used in the switch housing. The screws are used as glands: to avoid having the wire pressing against the iron of the casting.
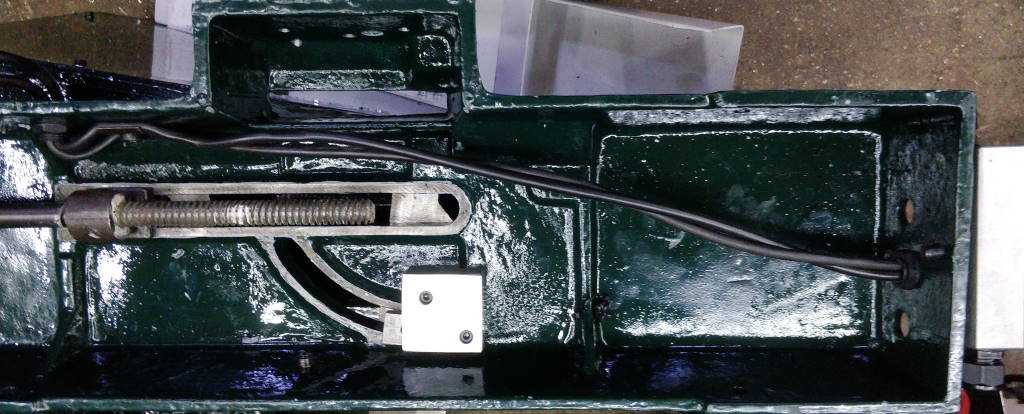 | 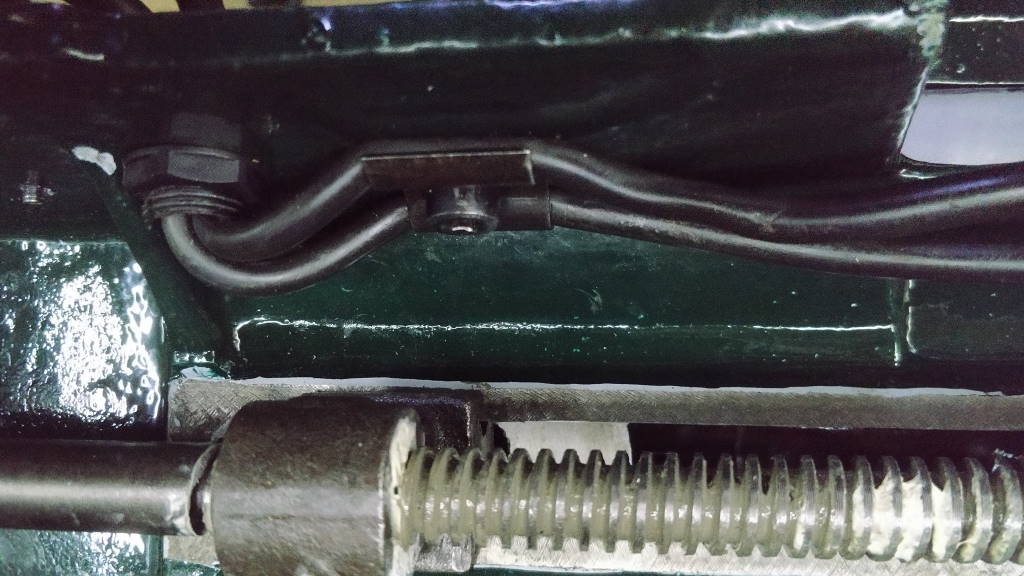 |
These photos show the wiring underneath the bandsaw. In the left-hand photo you can see the two glands made out of nylon bar. The one with the sanded flat is used on the entry to the connection box (on the right) and the plain one is used for the cable entry near the switch housing (on the left and shown in more detail in the right-hand photo). You can also see the cable restraint I fitted inside the casting.
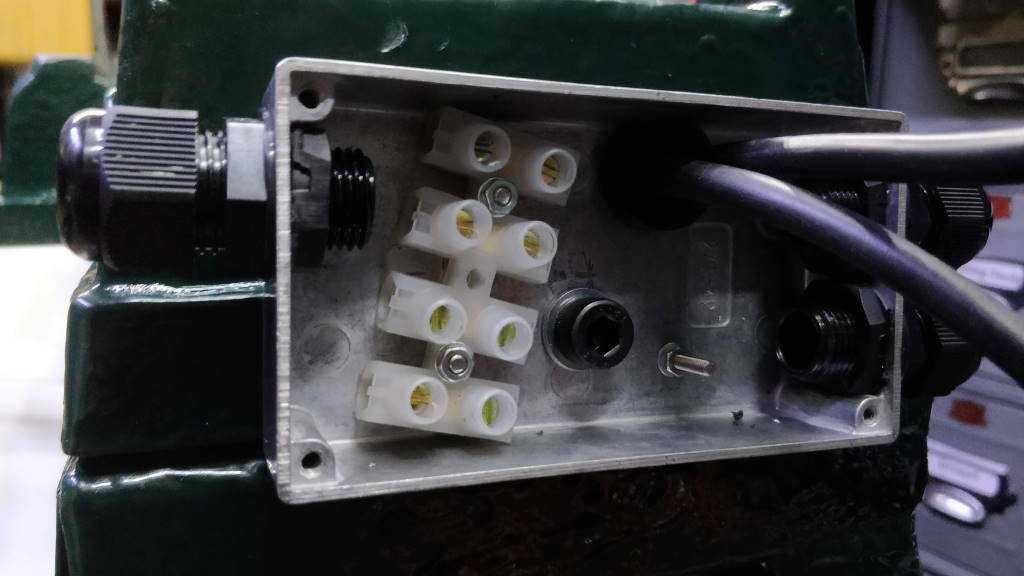 |
This photo shows the connection box (along with a "chocolate block" connector) fitted to the end of the bandsaw. It is held in place in two ways: firstly by the cap screw that mounts the bandsaw to the base frame and secondly by the gland through which the cables enter the connection box from underneath the saw. The small screw you can see in the bottom-right of the connection box is for the earth connection.
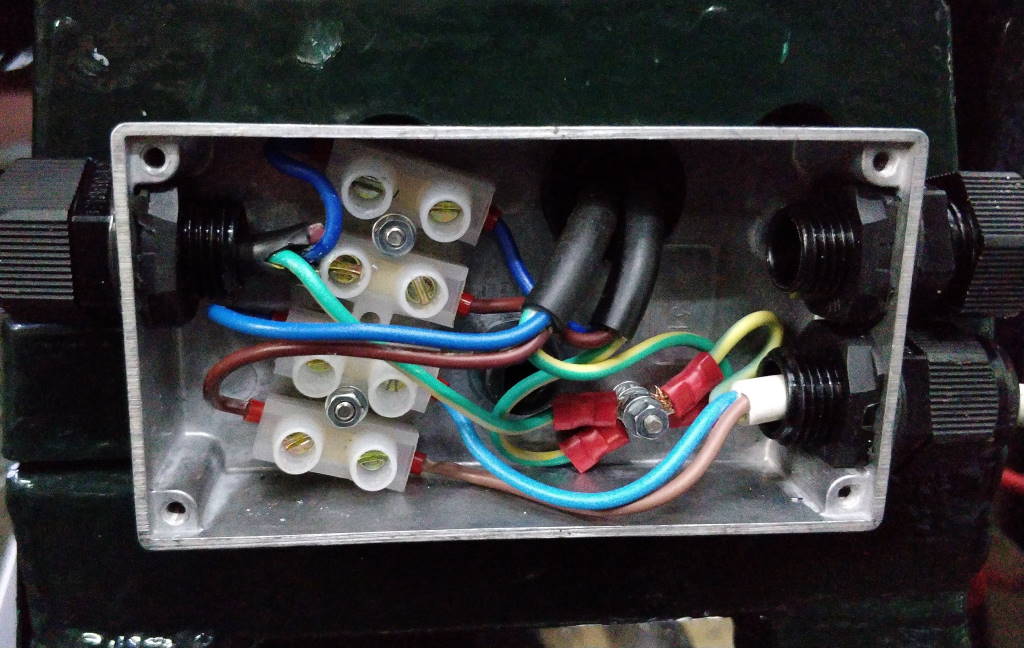 |
This photo shows the connection box with all of the wiring complete. The unused conduit entry in the top right was later used for powering my bandsaw light.
This website is free, but costs me money to run. If you'd like to support this site, please consider making a small donation or sending me a message to let me know what you liked or found useful.