Bar Clamps Build Process
18/5/2021
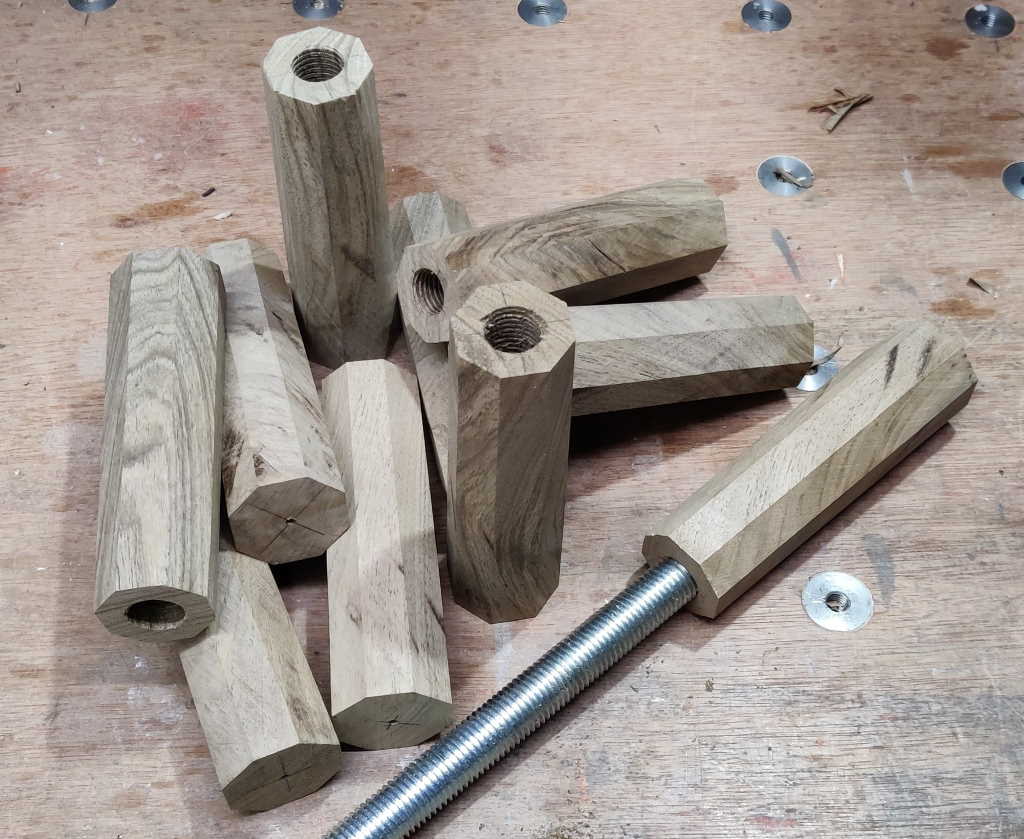 |
This photo shows the (partially made) handles that I'm going to use for the bar clamps. I don't have a woodturning lathe and didn't fancy covering my metal lathe in sawdust, so had to find an alternative method of making the handles. The dimensions were chosen to be roughly the same outside "diameter" as my favourite chisels (Narex 8116). They're made out of a lump of English Walnut that had a big knot in the middle. There wasn't much of the wood that didn't have cracks going through it (and it wasn't that big a piece anyway), but with some careful cutting up I managed to get ten pieces that I could use for handle making.
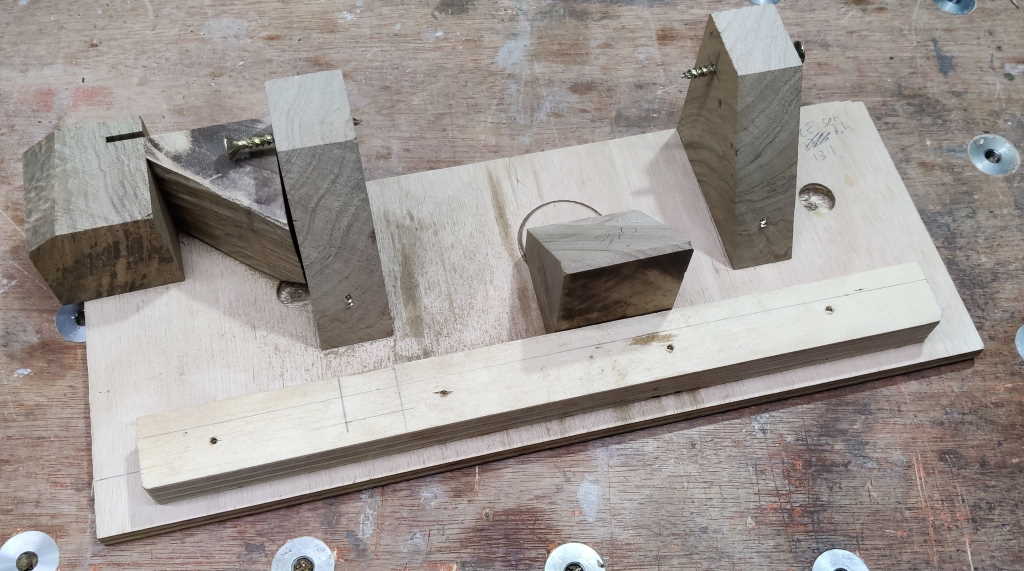 |
This shows the jig I used to make the handles. As you can probably see, it was knocked together out of bits I had lying around. The fledgling handle is mounted "between centres" using the two wood screws in the vertical blocks. The plywood bar gives something to grab hold of to hold the base plate against the table saw's fence. The two blocks to the left of the jig are just there to keep something between my hands and the table saw blade - I'll admit that this isn't the safest jig in the world, but I was extremely careful while using it as I was feeling very wary of that spinning blade! The other block (in the middle of the plywood bar in the photo) is a loose block with one side cut at an accurate 45° and the other at an accurate 90° to the base. In use this is pressed against the side of the fledgling handle (which started off as a square-section block) allowing the opposite side to be cut at either 90° to the opposite face or 45° to the opposite face.
Using this jig resulted in a slight taper to each of the parts (I think this was due to inconsistencies in how I tightened the screws), but I quite like the look of that, so I'm not complaining!
The holes in the end were drilled by placing each piece largest end down on the table of the bench drill, holding it by hand and drilling with a cheap and very nasty 15 mm Lidl Forstner bit. The tapping size for M16 is 14 mm, but I only wanted a very loose thread as I intend to fill in the thread form with epoxy to make a permanent attachment. When Neil Paskin made his handles, he used the threaded rod with a slit cut in to act as a tap. I've got an M16 tap, so I just used that - it went in extremely easily as a result of the large pilot hole and the fact it's cutting wood rather than metal. I may still cut a slot in the threaded rod to give the epoxy a way out, but tapping was nice and easy using a proper tap.
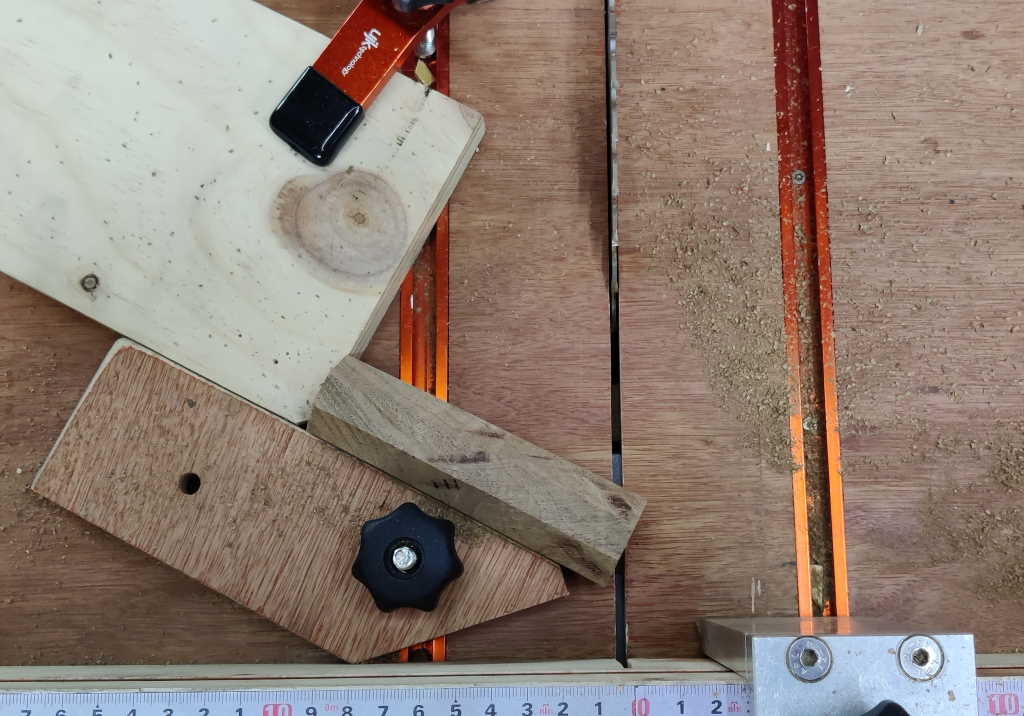 |
I wanted to get rid of the sharp corners on the backs of the handles, so I set up a couple of blocks on my cross-cut sled to give a consistent length and cut angle.
 |
With the two pieces of plywood fixed in place, I could place the handle on each of the eight sides and trim off the corners.
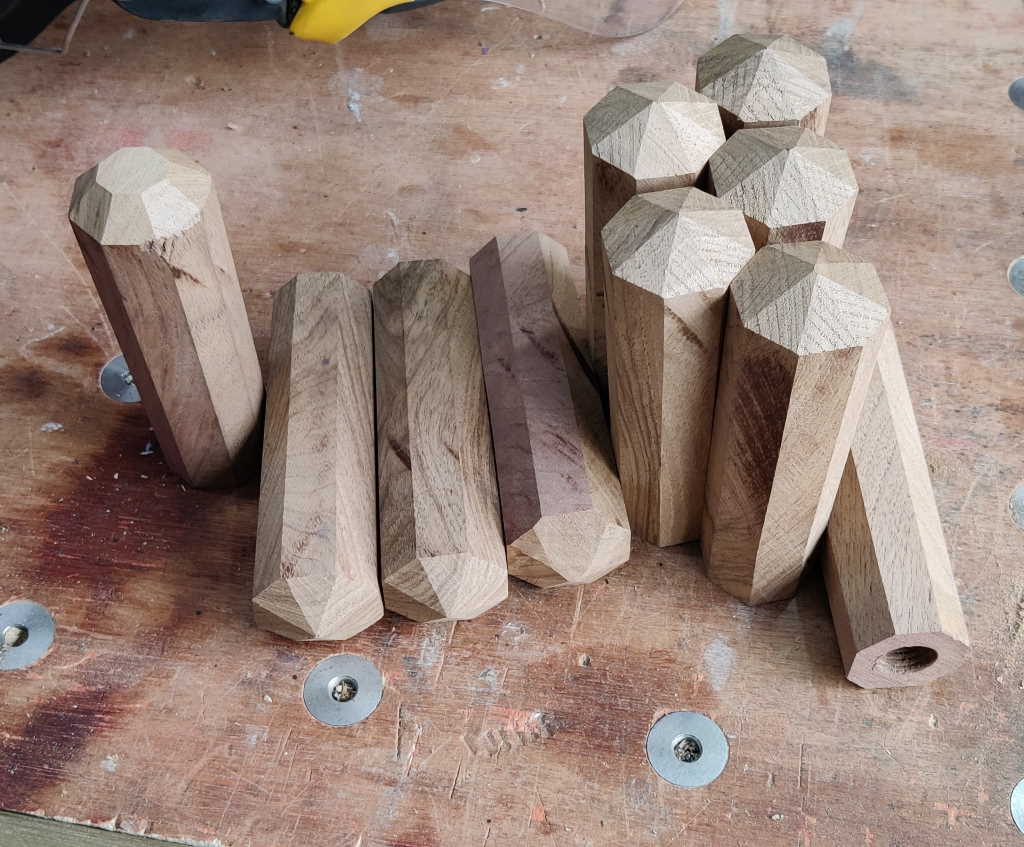 |
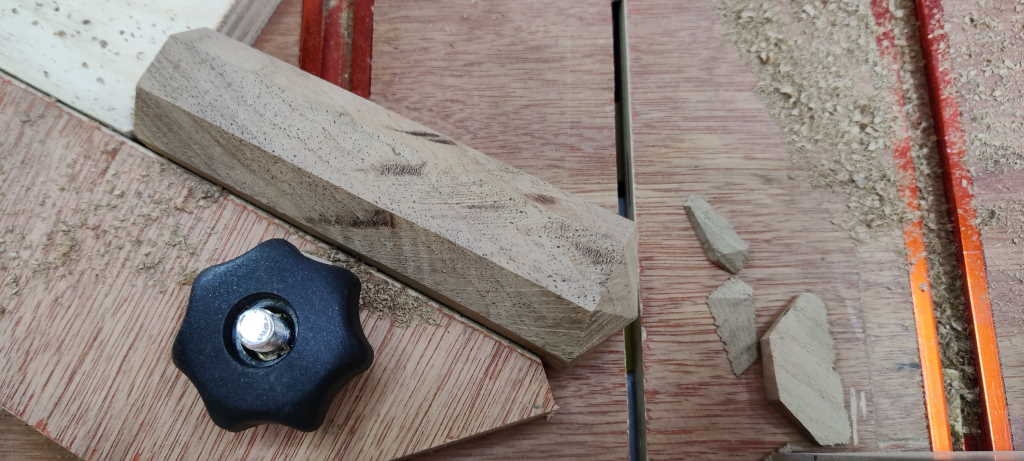
My first attempt didn't quite look right, so one handle is a bit different to the others, but by the time they're sanded I don't think it will be too obvious.
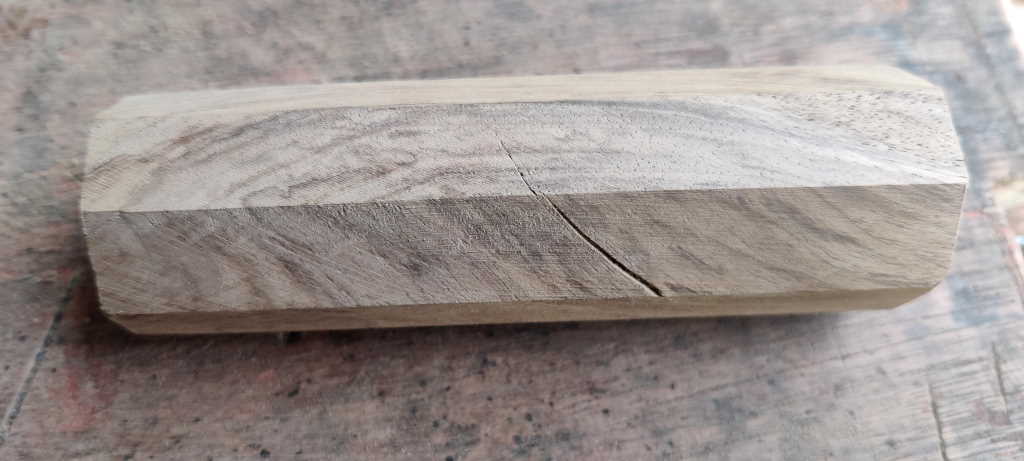 |
One of the clamps has a bit of a split (from the knot) in, but it's quite shallow and I don't think it'll cause a problem. I'll probably fill it with something (maybe epoxy since I'm going to mix some of that up to attach the handles to the threaded rod).
The next job for the handles is to spend some (probably quite a lot of) time with some sandpaper tidying them up. I'll do that in between coats of paint on the split nuts.
Page Navigation:
| First (#1) | Previous (#27) | Next (#29) | Last (#32) |
This website is free, but costs me money to run. If you'd like to support this site, please consider making a small donation or sending me a message to let me know what you liked or found useful.