Bar Clamps Build Process
15/5/2021
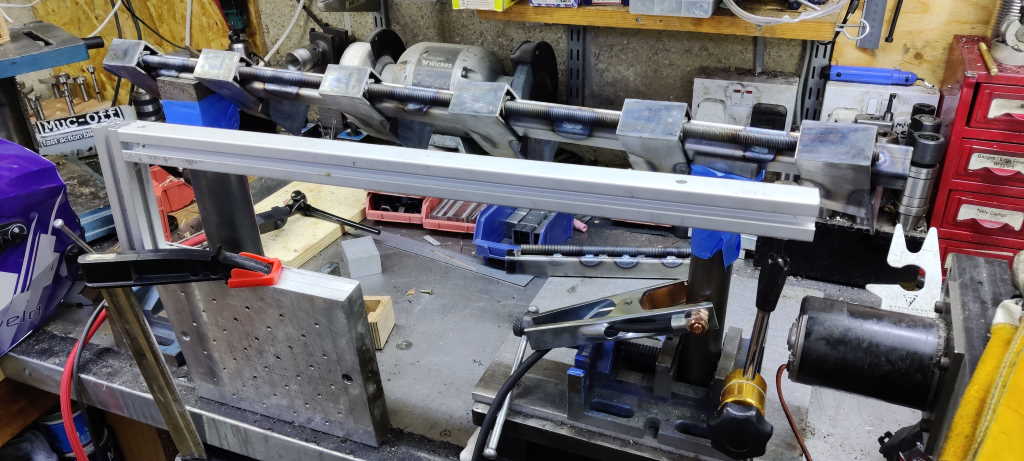 |
The shorter bars were (unsurprisingly) quicker and easier than the longer ones. This photo shows the set-up for the shortest bar length I've made. As you can see, I used the V-blocks mounted on bar stock that I'd used for the longest ones, but I didn't have to move the arm support during welding and didn't have to use the supports on the milling machine or bench drill table.
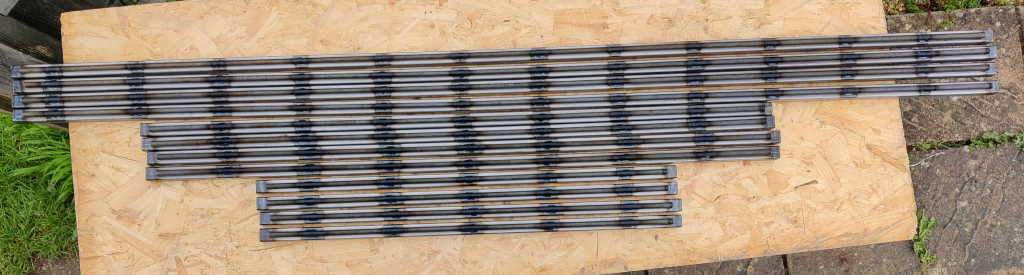 |
This shows all of the bars with the threaded rod attached and ACF50 brushed on. The longest ones are 1880 mm, the middle length ones are 1200 mm and the short ones are 800 mm. In theory, the maximum clamping length should be about 150 mm shorter than those dimensions.
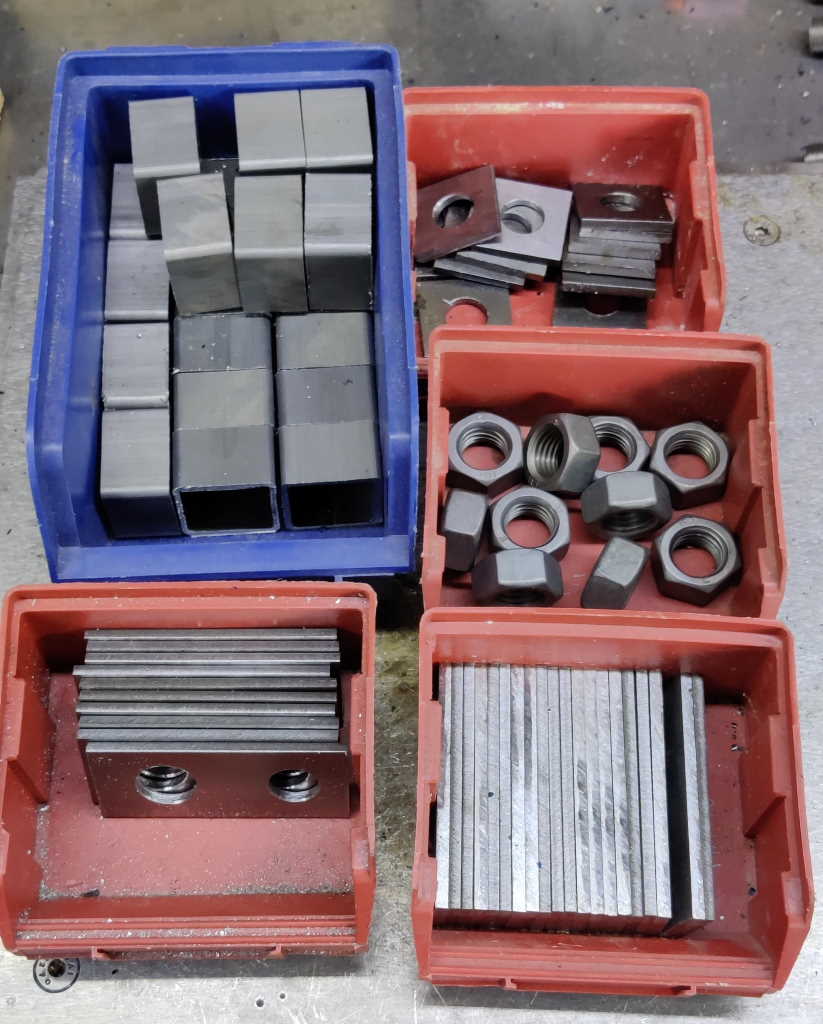 |
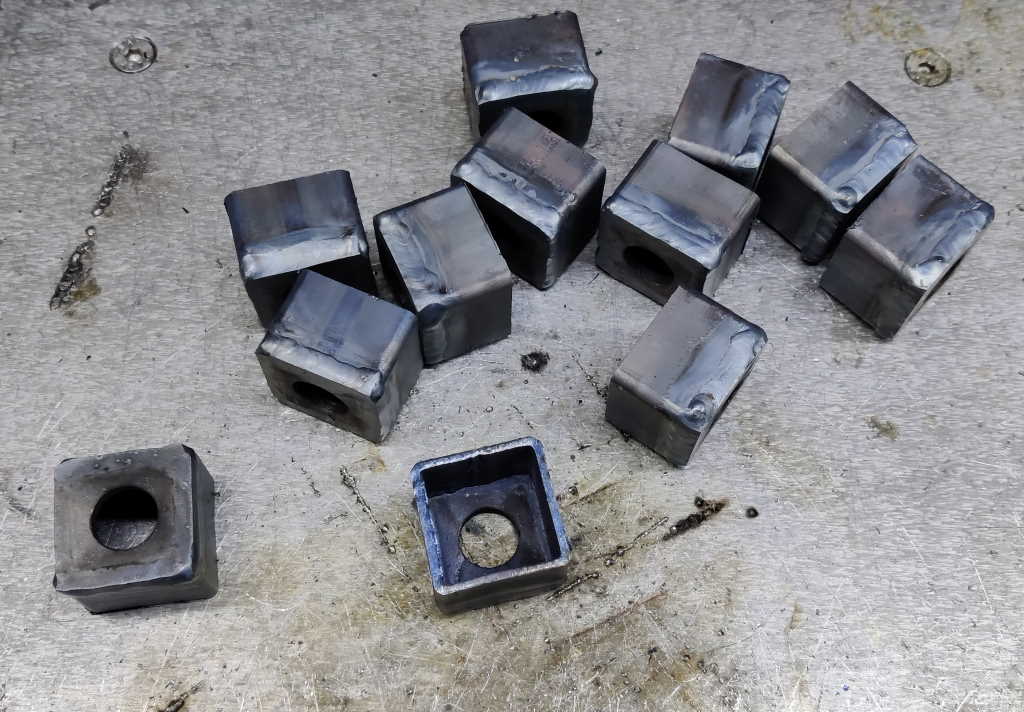
This photo shows the pieces that I have left to weld together (excluding the M16 split nuts that hold the threaded rod into the screw jaw). There are 74 pieces in this photo! The small plates with holes in (of which there are 12) are for the end caps for the bars (as you can see above I've made 12 bars, even though there will only be 8 to 10 heads as the heads can be moved to different bars as required). They get welded onto twelve of the little pieces of 30 mm × 30 mm × 2 mm box section and then the corners will be cleaned up with an angle grinder. The other 10 bits of box section, the nuts and the remaining bits of flat bar form the end plates through which the M16 threaded rod will go.
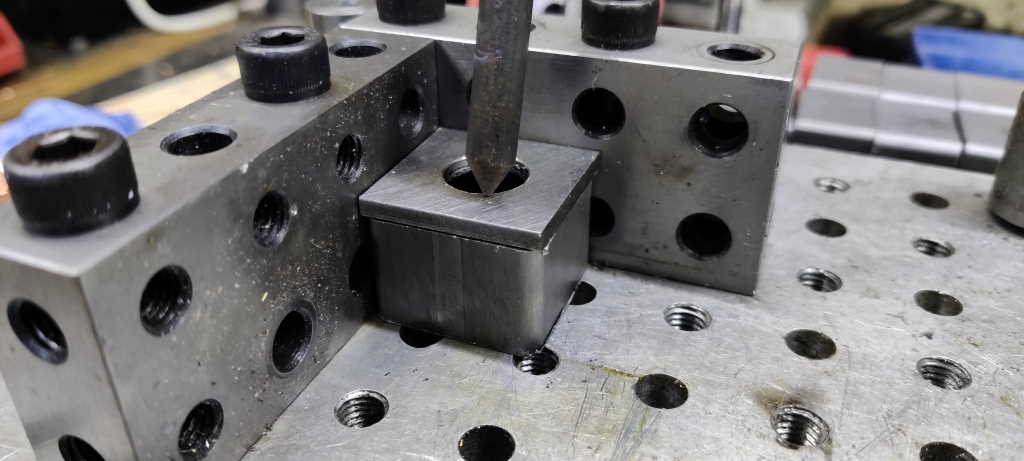 |
I started with the end caps. As the holes in the bits of flat bar were drilled oversize (14 mm), the alignment of these isn't especially critical, but I used my fixture plate again just because it made it easy and quick. With the box section piece and the plate against the two 20–40–80 blocks, I tacked the corner nearest, then pulled it out of the jig and tacked the opposite corner.
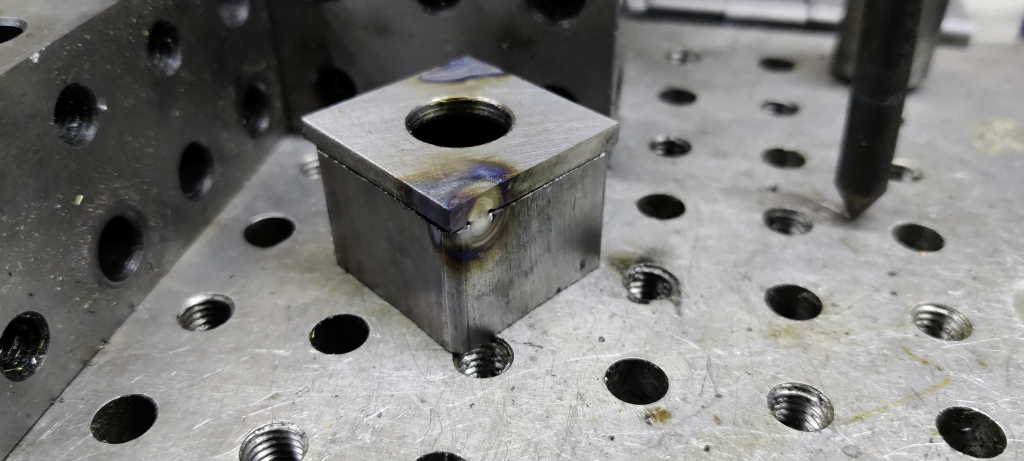 |
I tacked all of the end caps in one go rather than tacking one, welding it and then tacking the next.
 |
I then removed the jig from the bench and welded all the caps on autogenously (without filler rod). These parts are mainly aesthetic, so the welds don't have to be very robust.
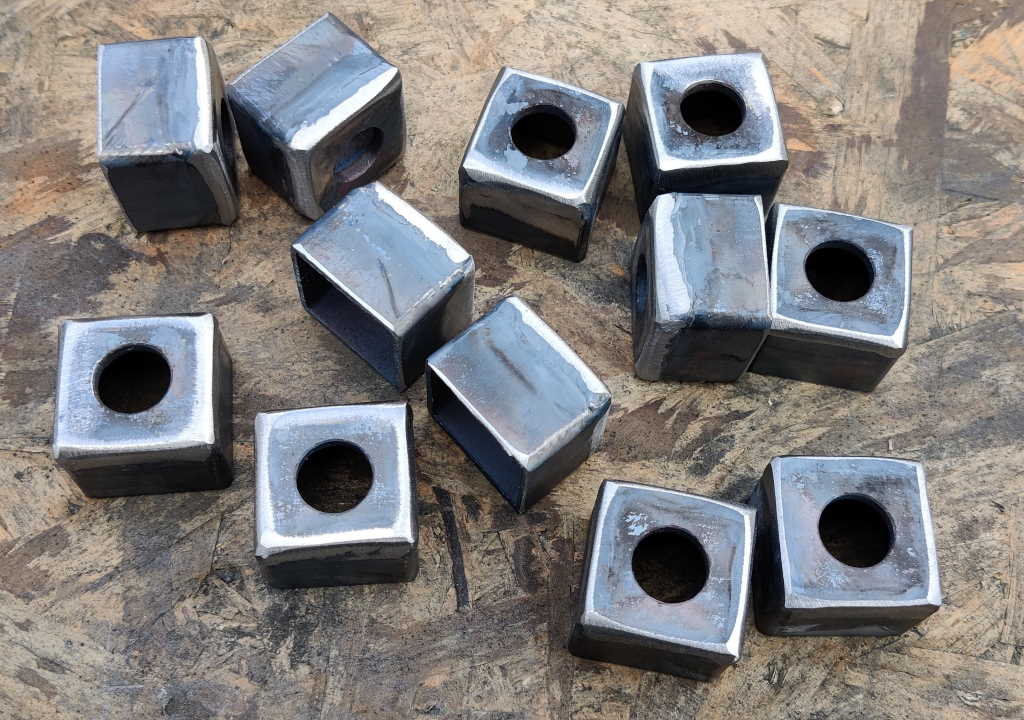 |
After welding, I cleaned the corners up with the angle grinder. Hopefully these parts will look a bit better after painting.
There are now 50 pieces left to weld together to make the 10 end plates, plus the 10 split nuts to complete the screw jaws.
Page Navigation:
| First (#1) | Previous (#21) | Next (#23) | Last (#32) |
This website is free, but costs me money to run. If you'd like to support this site, please consider making a small donation or sending me a message to let me know what you liked or found useful.