Bar Clamps Build Process
8/5/2021
 |  |
The next job was to weld one half of each split M16 nut onto the end of a bit of threaded bar. The other half will be welded in place after passing through the hole in the rear plate of the screw jaw, but I thought I'd get this one done in advance.
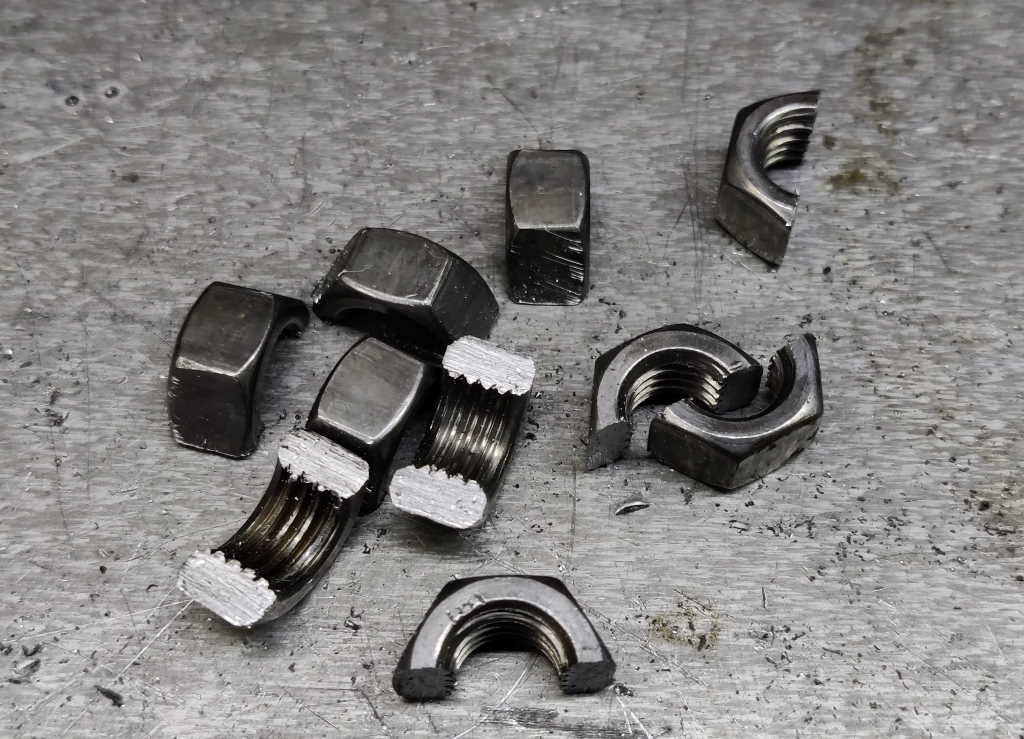 |
The first welding job for the sliding jaws is to fix half an M12 nut onto a piece of 3 mm × 31 mm × 50 mm steel bar. The nut (which was cut in half with a hacksaw after coming out of the citric acid bath) needs to be at the end of the flat bar and (more importantly) needs to be aligned with the flat bar.
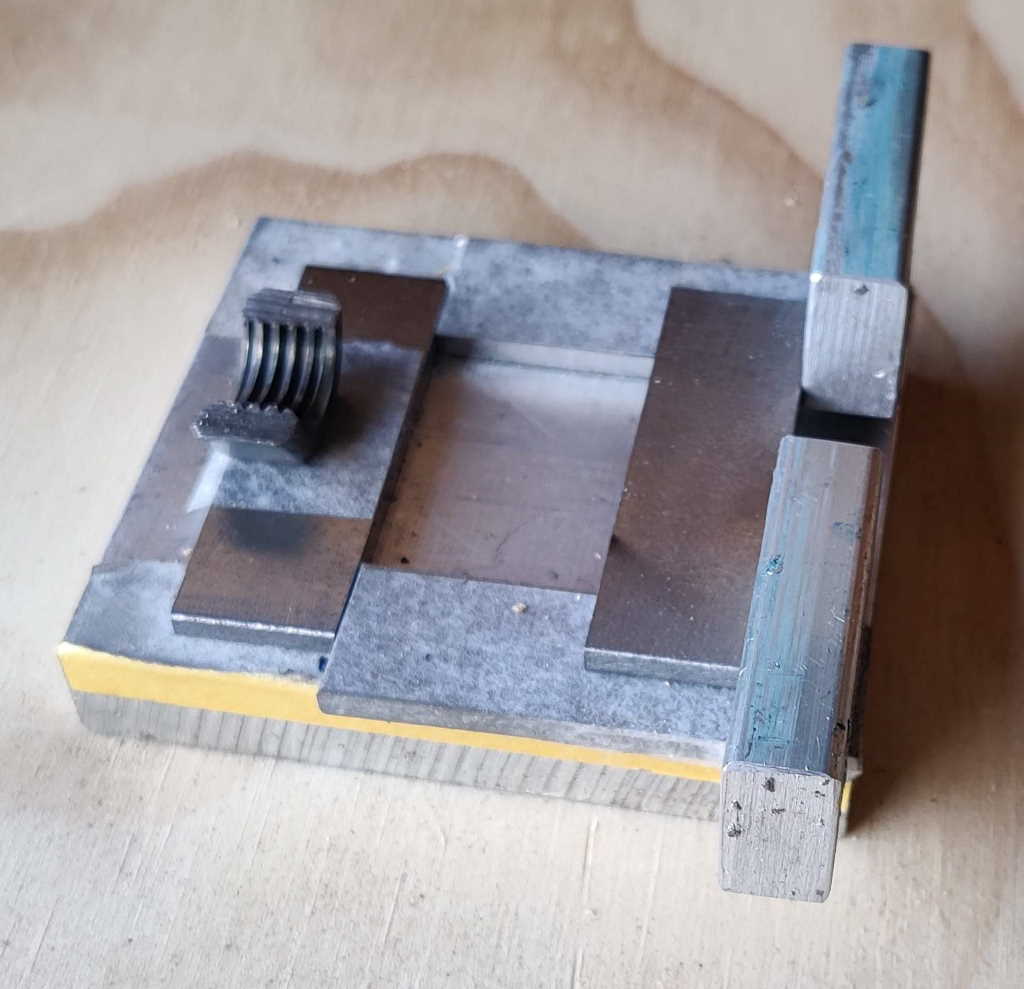 | 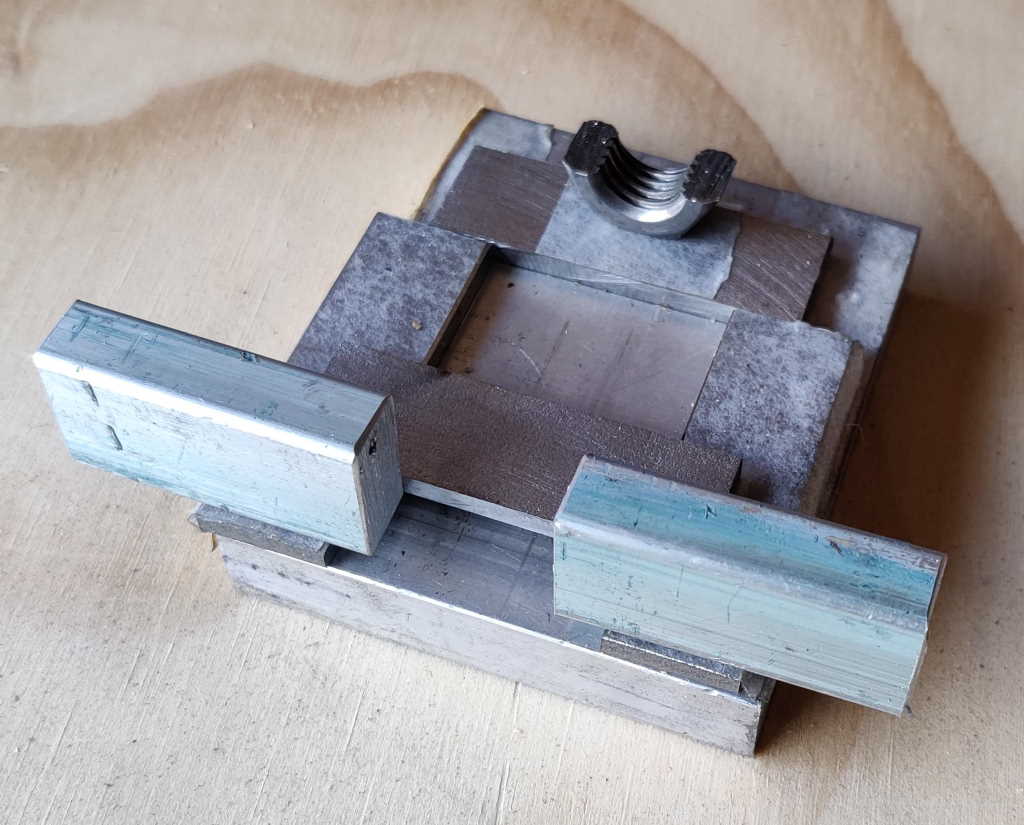 |
The photos above show the jig I made to help with this process. It was made out of various offcuts I had lying around, hence the slightly strange sizes of pieces. The base plate is aluminium, the thin flat bar pieces are offcuts of 3 mm steel and the "wings" that support the side of the nut are aluminium. It's held together with double-sided tape.
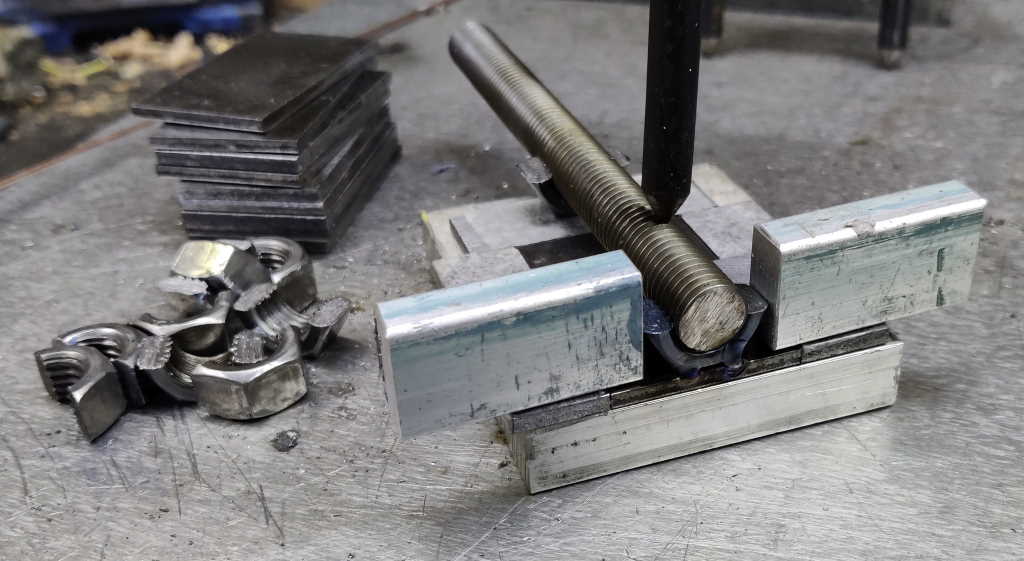 |
This photo shows how it is used. The piece of flat bar gets slid into the jig as far as it will go (it slides easily as the spacer pieces are the same thickness and there's the additional thickness from the double-sided tape). A half-nut is placed in the pocket and an offcut of M12 threaded rod dropped into both half-nuts. This makes sure that the half-nut is aligned with the axis of the flat bar. My welder's third hand holds the threaded bar down and the half-nut can be tack-welded in place. It's then removed from the jig and fully welded.
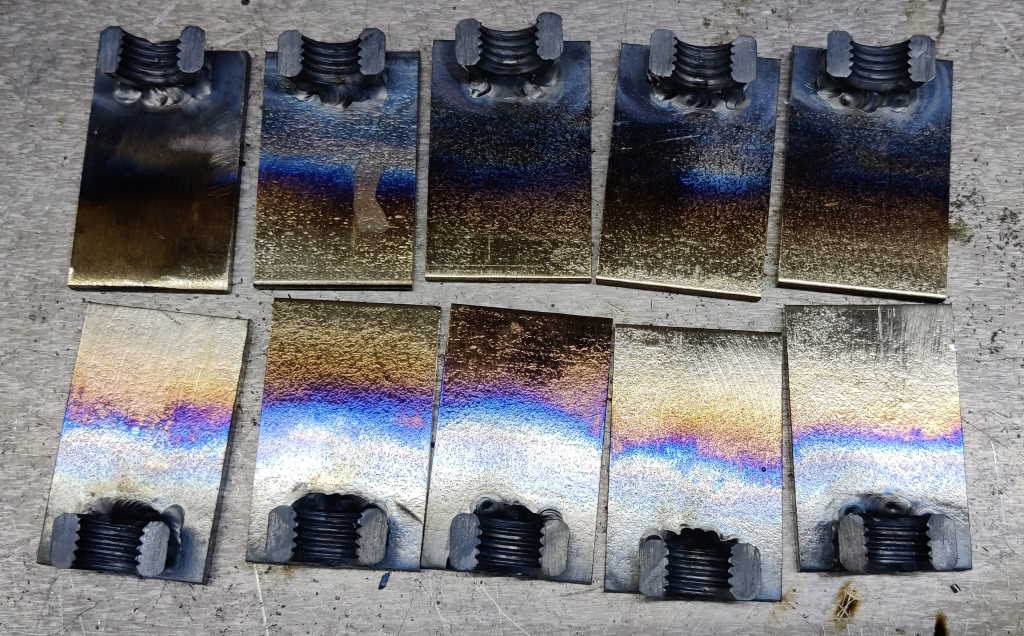 |
With the jig made, I was able to tack weld all of the pieces in about 20 minutes and be confident that they were all in the right place. I did have to be careful to ensure I didn't melt the thread at all as there's no way I can pass a tap through the thread to clean it up if I get it wrong!
Page Navigation:
| First (#1) | Previous (#10) | Next (#12) | Last (#32) |
This website is free, but costs me money to run. If you'd like to support this site, please consider making a small donation or sending me a message to let me know what you liked or found useful.