Bar Clamps Build Process
8/5/2021
I decided to weld the inserts into the bars first. The welds are relatively straightforward, but slightly awkward due to the length of the bars (and the relatively short length of my bench!)
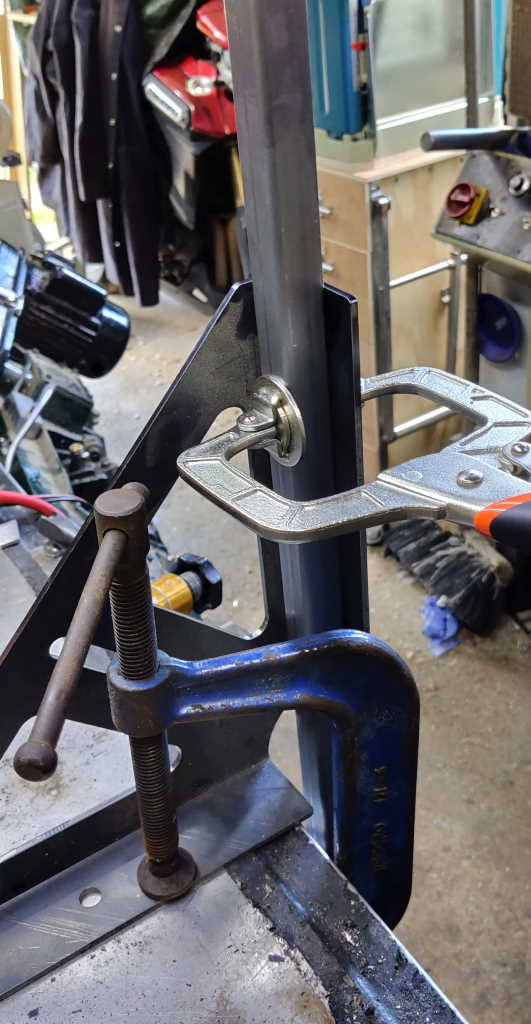 |
As the bars are too long for my metalwork bench, I decided to weld the inserts in with the bars held vertically. To support the bars for welding, I used a G-clamp to hold a welding square to the edge of my bench and then held each bar in place with a C-clamp. The advantage of the C-clamp (a wide jawed variant of a mole grip) here is that, once adjusted, it's very quick to unclamp one bar and clamp up the next.
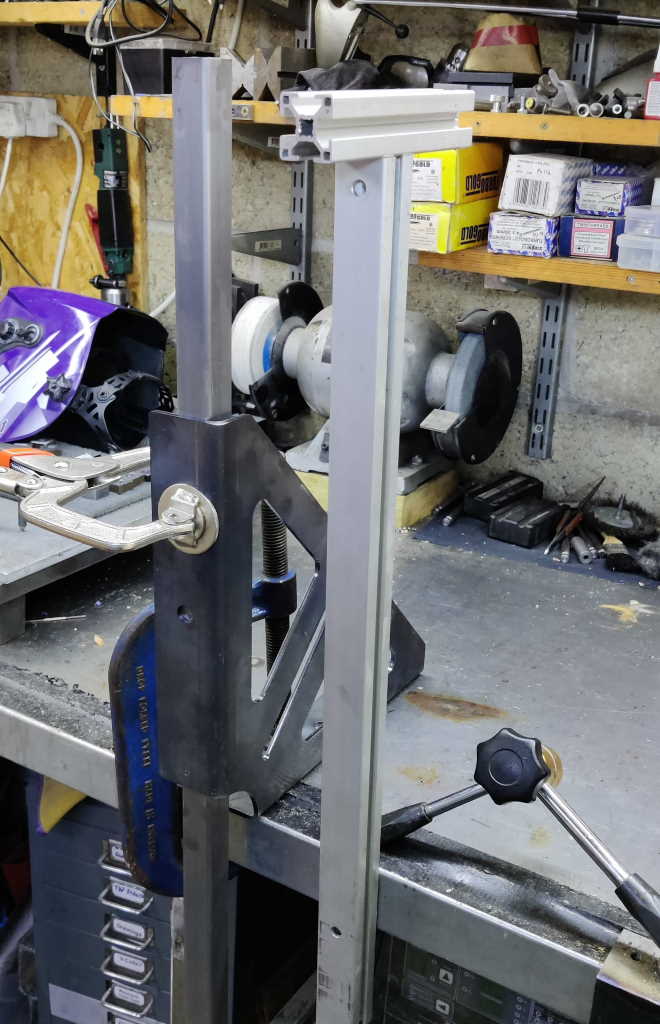 | 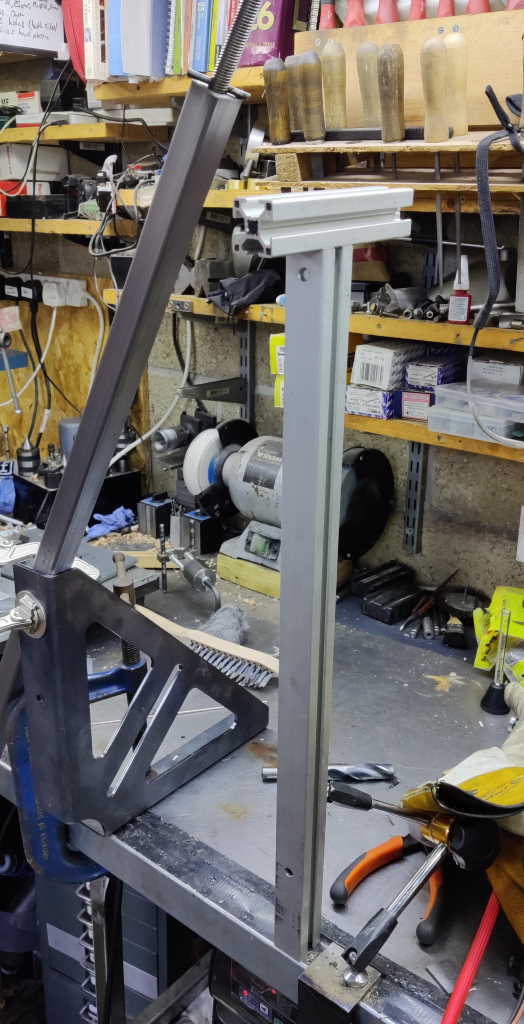 |
One disadvantage of having the bars held vertically is that it means that I'm working a long way off the bench. To make this more comfortable, I used my welding arm support with an extra bit of aluminium extrusion attached to the end. For the really long bars, I held them diagonally, but using the same welding square to support them.
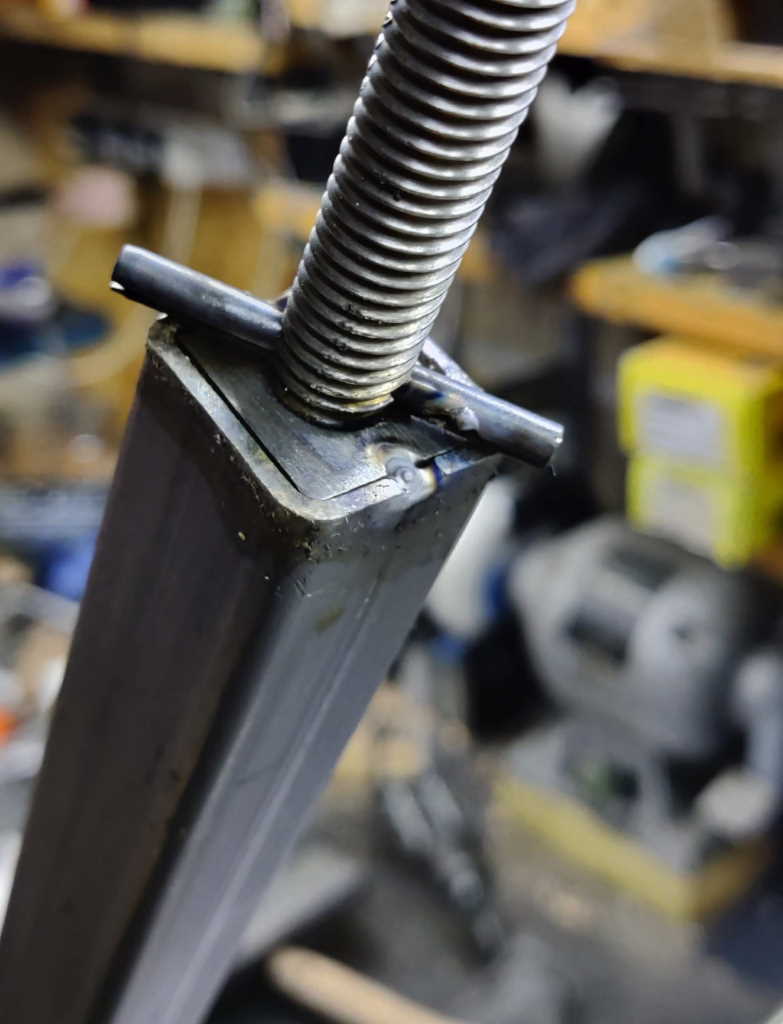 |  |
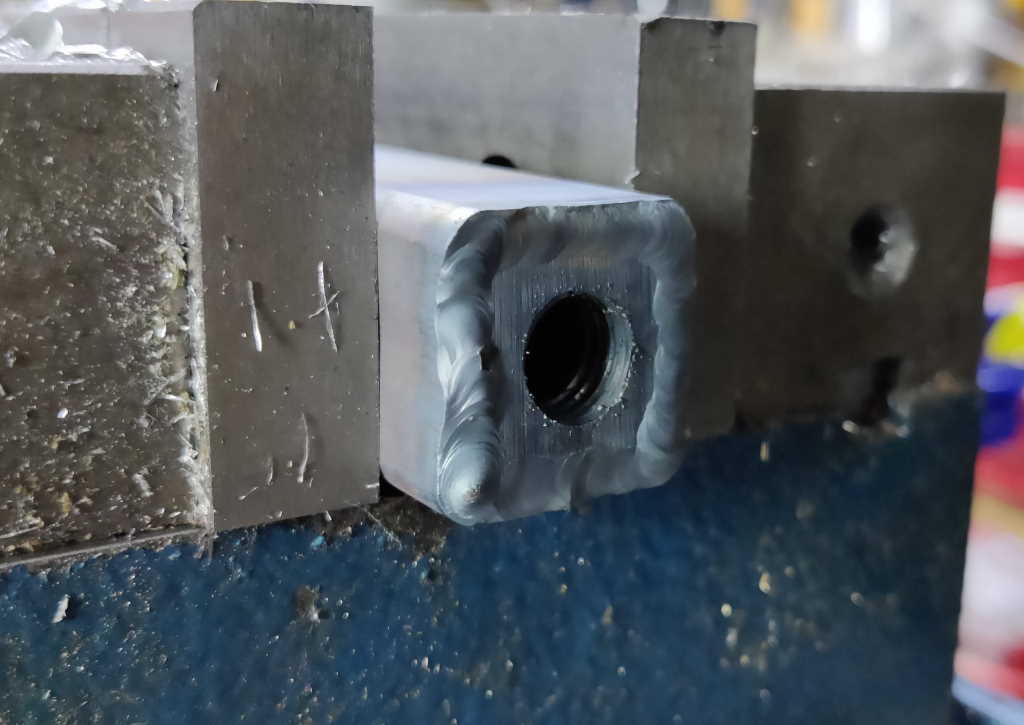
The other disadvantage of vertical bars is that there's a risk of the insert falling down into the bar. To stop this from happening, I cross-drilled an offcut of M12 threaded rod and inserted a roll-pin. This can be inserted into the threaded insert and dropped into the end: the roll-pin stops the insert from falling. The insert can then be tack-welded in place, the threaded rod removed and the welding completed. I made sure I placed the tack welds close to the roll-pin but on the side that is clockwise to the threaded rod. That meant that, as the threaded rod was turned anticlockwise to remove it, the roll-pin had risen up as far as possible to give it the best chance of clearing any bulge caused by the tack welds.
 | 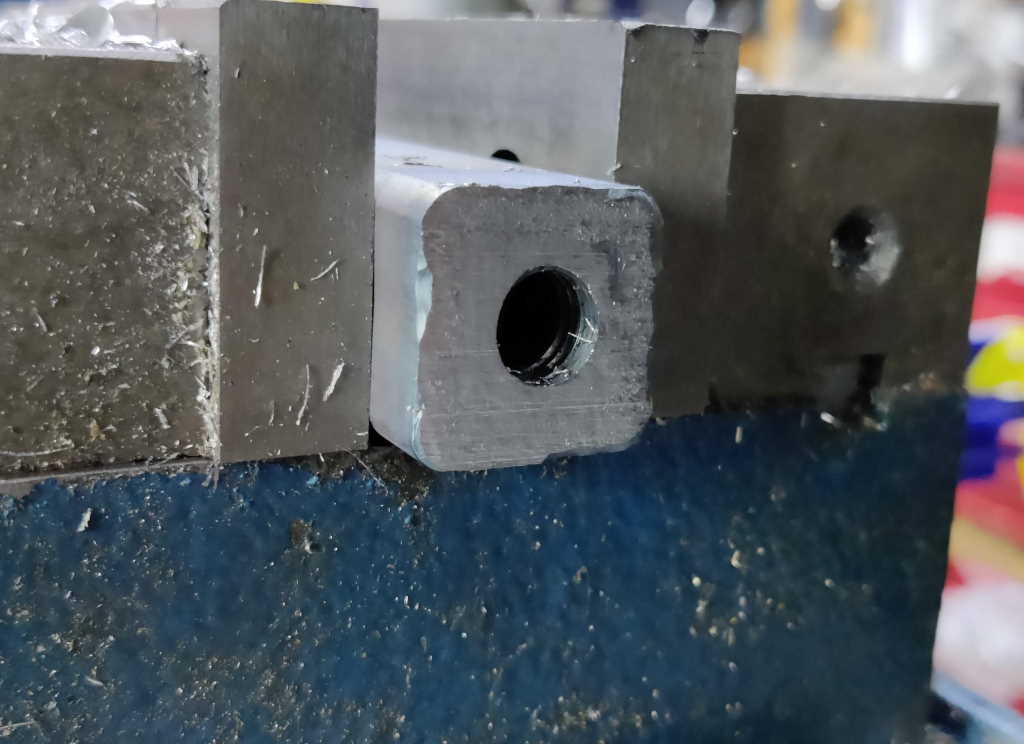 |
I'm not sure if this step was really necessary, but I decided to clean up the end faces of the bars. I did this on the milling machine as I have one and it seemed easy, although there are plenty of other approaches I could have used (or I could have just not bothered). The advantage of doing this is that it gives a nice flat surface for the end plate to bear on when the screw is tightened.
Page Navigation:
| First (#1) | Previous (#9) | Next (#11) | Last (#32) |
This website is free, but costs me money to run. If you'd like to support this site, please consider making a small donation or sending me a message to let me know what you liked or found useful.