Bar Clamps Build Process
16/5/2021
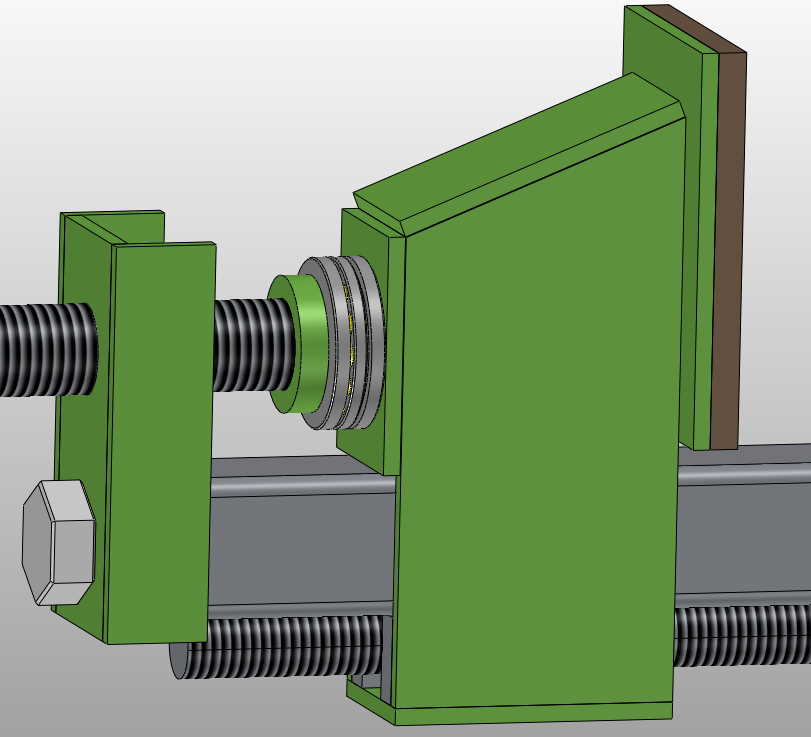 |
Following a suggestion from a forum, I decided to try using a thrust bearing on the screw jaw to make the action of the screw a bit smoother as it's tightened. This has the (potential) disadvantage that it could reduce the ability to cope with angular misalignment, but hopefully the reinforcement of the end plate with side pieces and the relatively accurate drilling of holes with the milling machine should stop that being an issue. The bearings I'm using are designated as 51103: 17 mm inner diameter, 30 mm outer diameter and 9 mm thick; I bought 10 of them for £15, although I could have cut that in half if I were patient enough to wait for delivery from the far east.
The other problem this introduces is how to paint the parts. My plan had been to get everything welded together and then paint. It's going to be quite hard to paint the plate on the jaw and the split nut on the thread without getting paint on the thrust bearing. I'm aiming for at least eight clamp bodies, but have been making ten of each part to give myself some scope for messing things up. Since that's the case, I thought I'd try painting one of the jaws before doing the final weld. All being well, the final weld will be far enough away from the paint that the heat won't ruin the paint! I'll have to paint the outer split nut after welding it to the threaded rod, but this is a small enough area that it should be easy-ish to do with a brush (or I could leave that part unpainted).
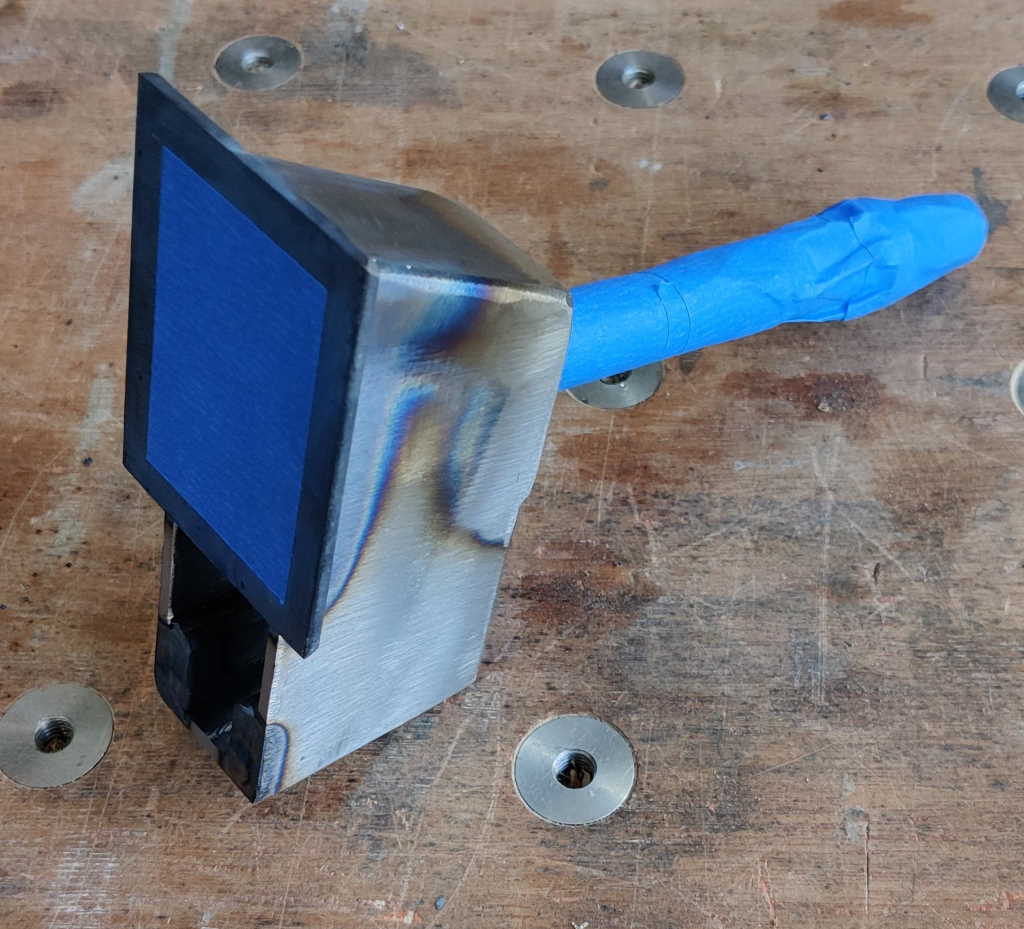 |
There are going to be wooden pads attached to the jaws (to stop the jaws from damaging the workpiece being clamped). These will be glued in place (Neil Paskin used hot melt glue and I will probably try the same). To be sure that the glue has something (other than paint) to adhere to, I masked the central area of the jaws with masking tape. I also masked the threaded rod to stop paint from getting into the threads. For this one, I haven't masked the area where the box section goes (although for the sliding jaw, I hung it on a bit of threaded rod to stop paint getting into the half-nut); it would be much easier not to have to mask the internal area, so I thought I'd try not doing so and see whether it's okay.
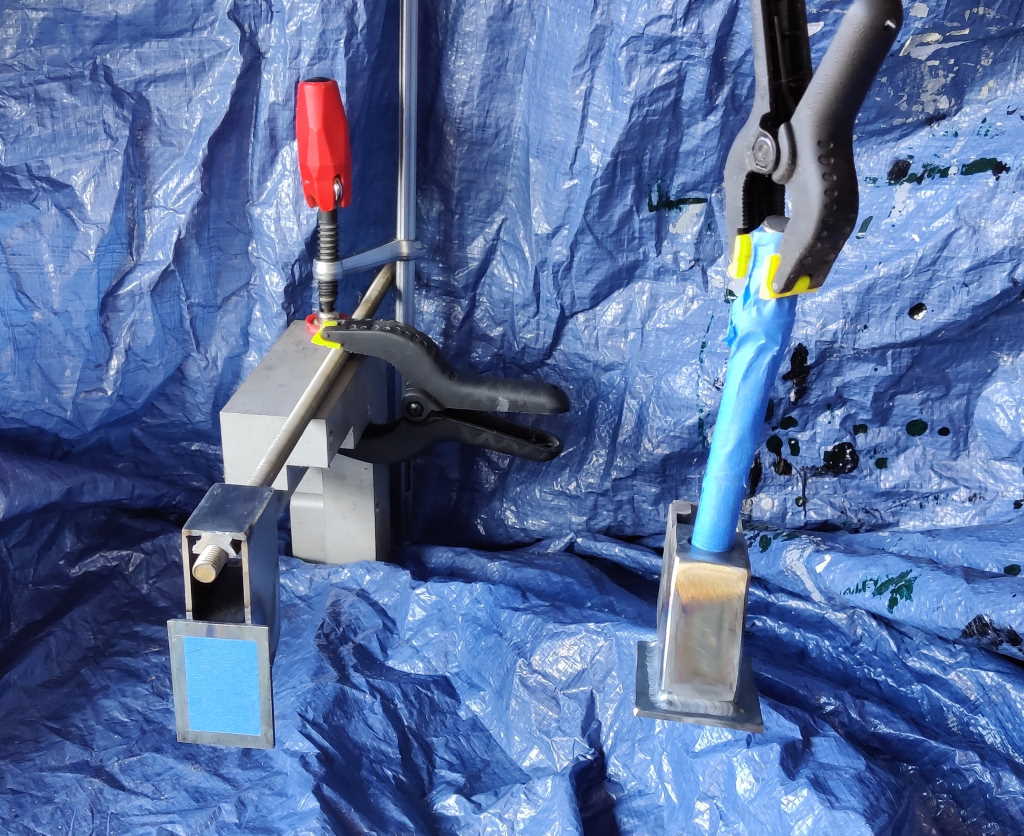 |
This photo shows the set-up I used for painting a pair of jaws (I also covered the rear clamp with a rag to stop the clamp from getting painted). The screw jaw is simply hanging from a spring clamp, which is attached to the ceiling with a bit of wire. The strange-shaped bit of aluminium that is clamped down (to my temporary shelf, which has been covered in a tarpaulin) is something that came out of a skip a while ago and just seemed a good shape.
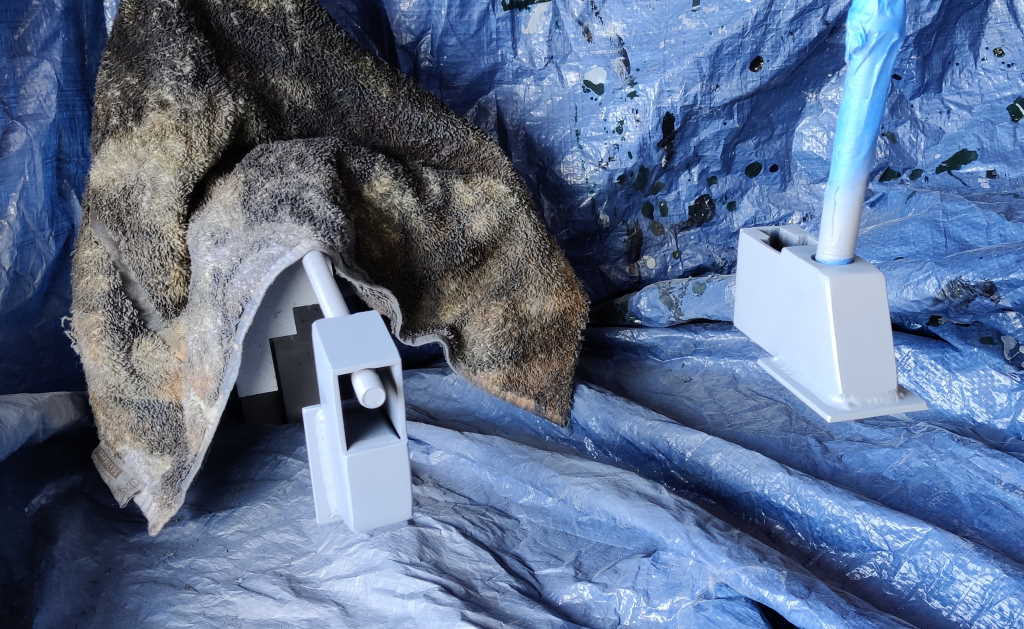 |
I gave both jaws a coat of primer (Tractol Light Grey) and left them over night. This was my first go at using spray paint and I was pleased with how easy it was (compared to brushing) to get a good even coat.
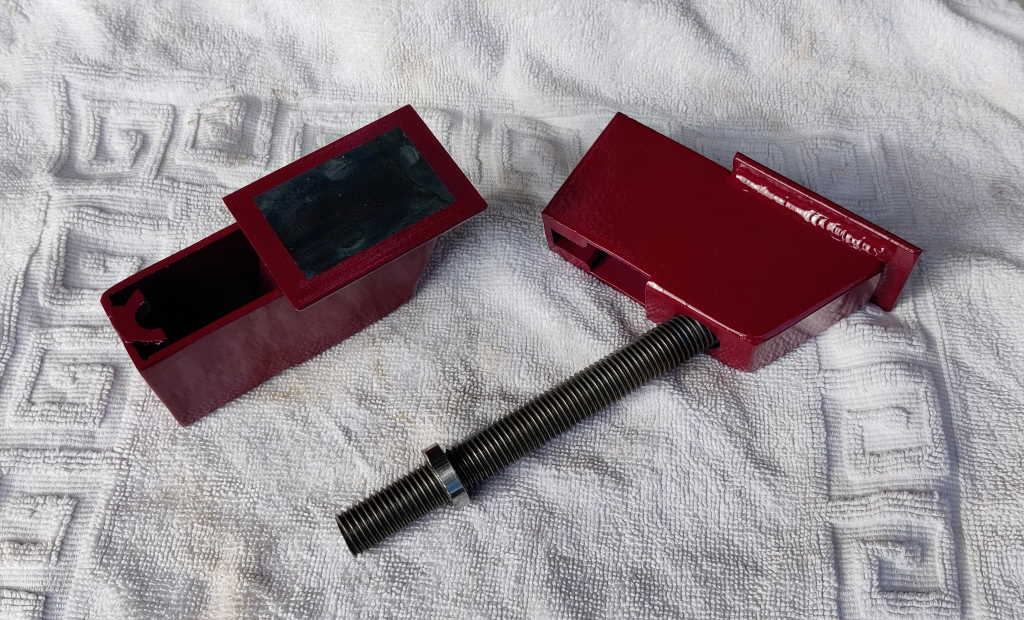 |
I then gave them two coats (about 10 hours apart) of Tractol RAL 4004 ("Claret Red"), again sprayed onto the jaws. Once the second coat had been left overnight to dry, I peeled the masking tape off.
The next job is to fit the thrust bearing and weld the split nut into place. It'll be interesting to see what the paint looks like after I've done that!
Page Navigation:
| First (#1) | Previous (#23) | Next (#25) | Last (#32) |
This website is free, but costs me money to run. If you'd like to support this site, please consider making a small donation or sending me a message to let me know what you liked or found useful.